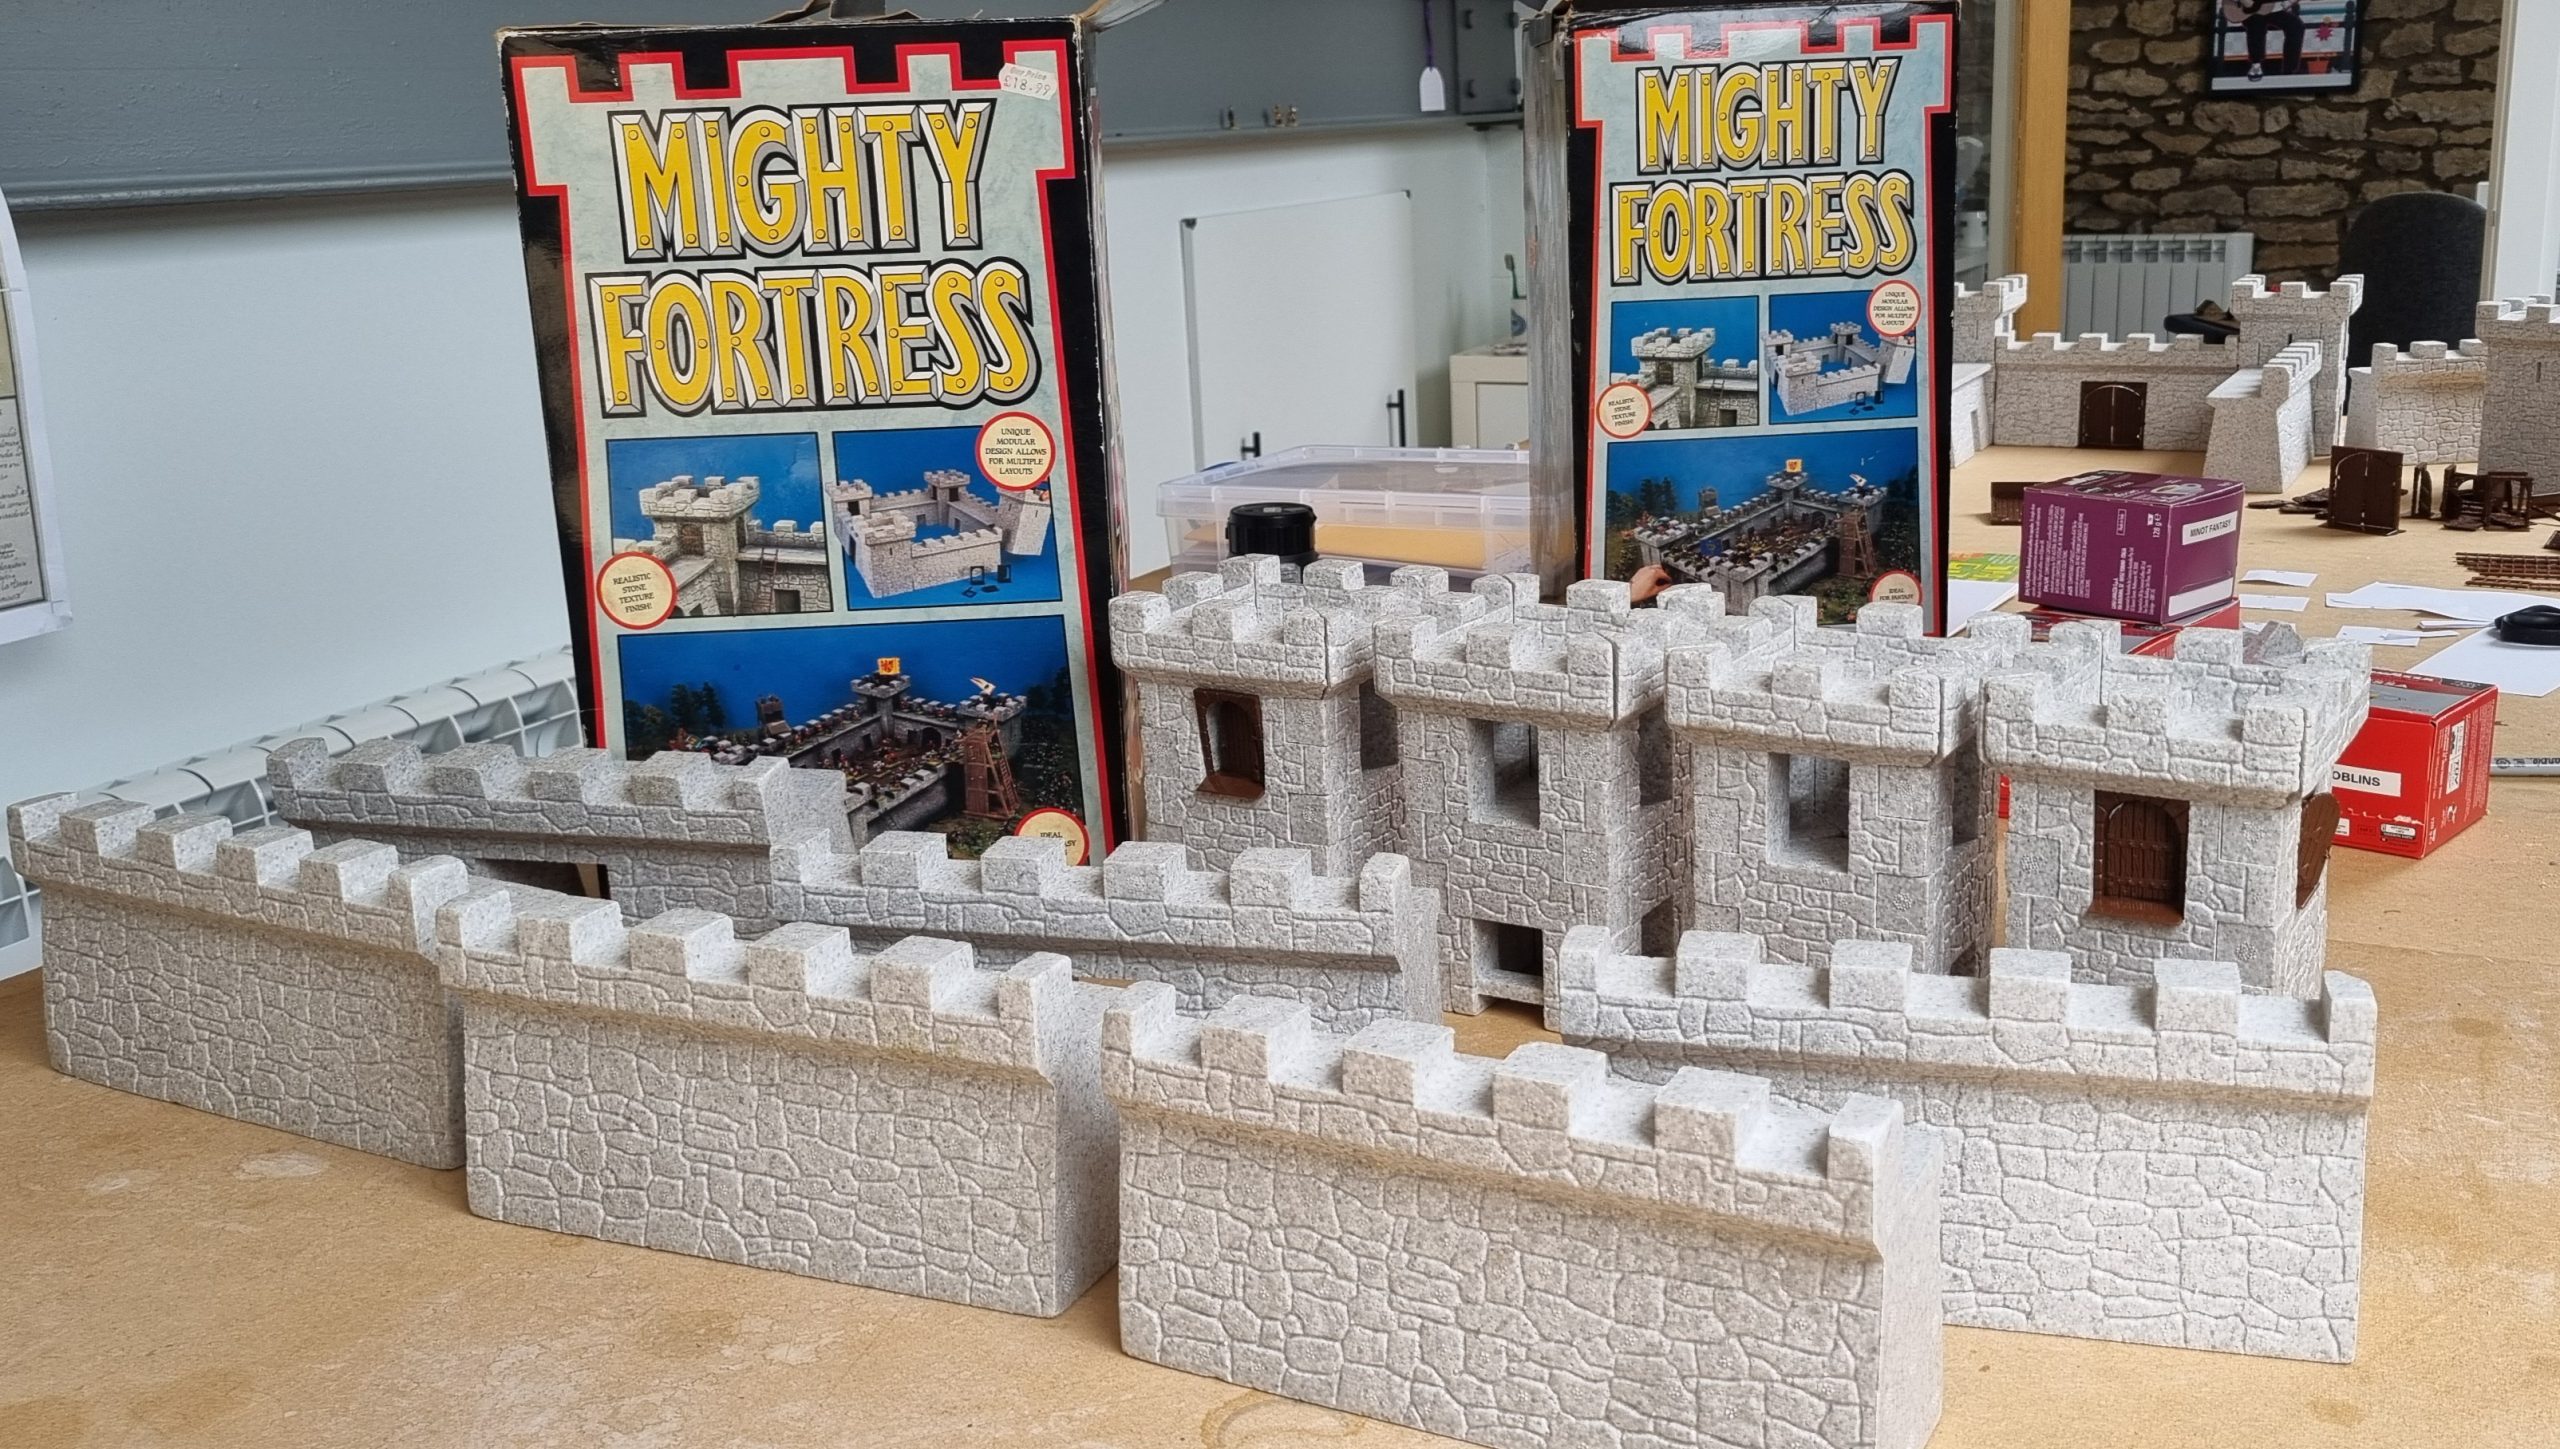
[Q] What do you do when a very good friend gifts you a vintage Citadel Mighty Fortress?
[A} Put in a cupboard for 3 years. Then buy a second one. Then – finally – build the bloody thing.
The very good friend was the totally splendid Iain Burt (See his excellent blog here ), and I am very grateful to him for the donation of what is a classic model in wargaming history.
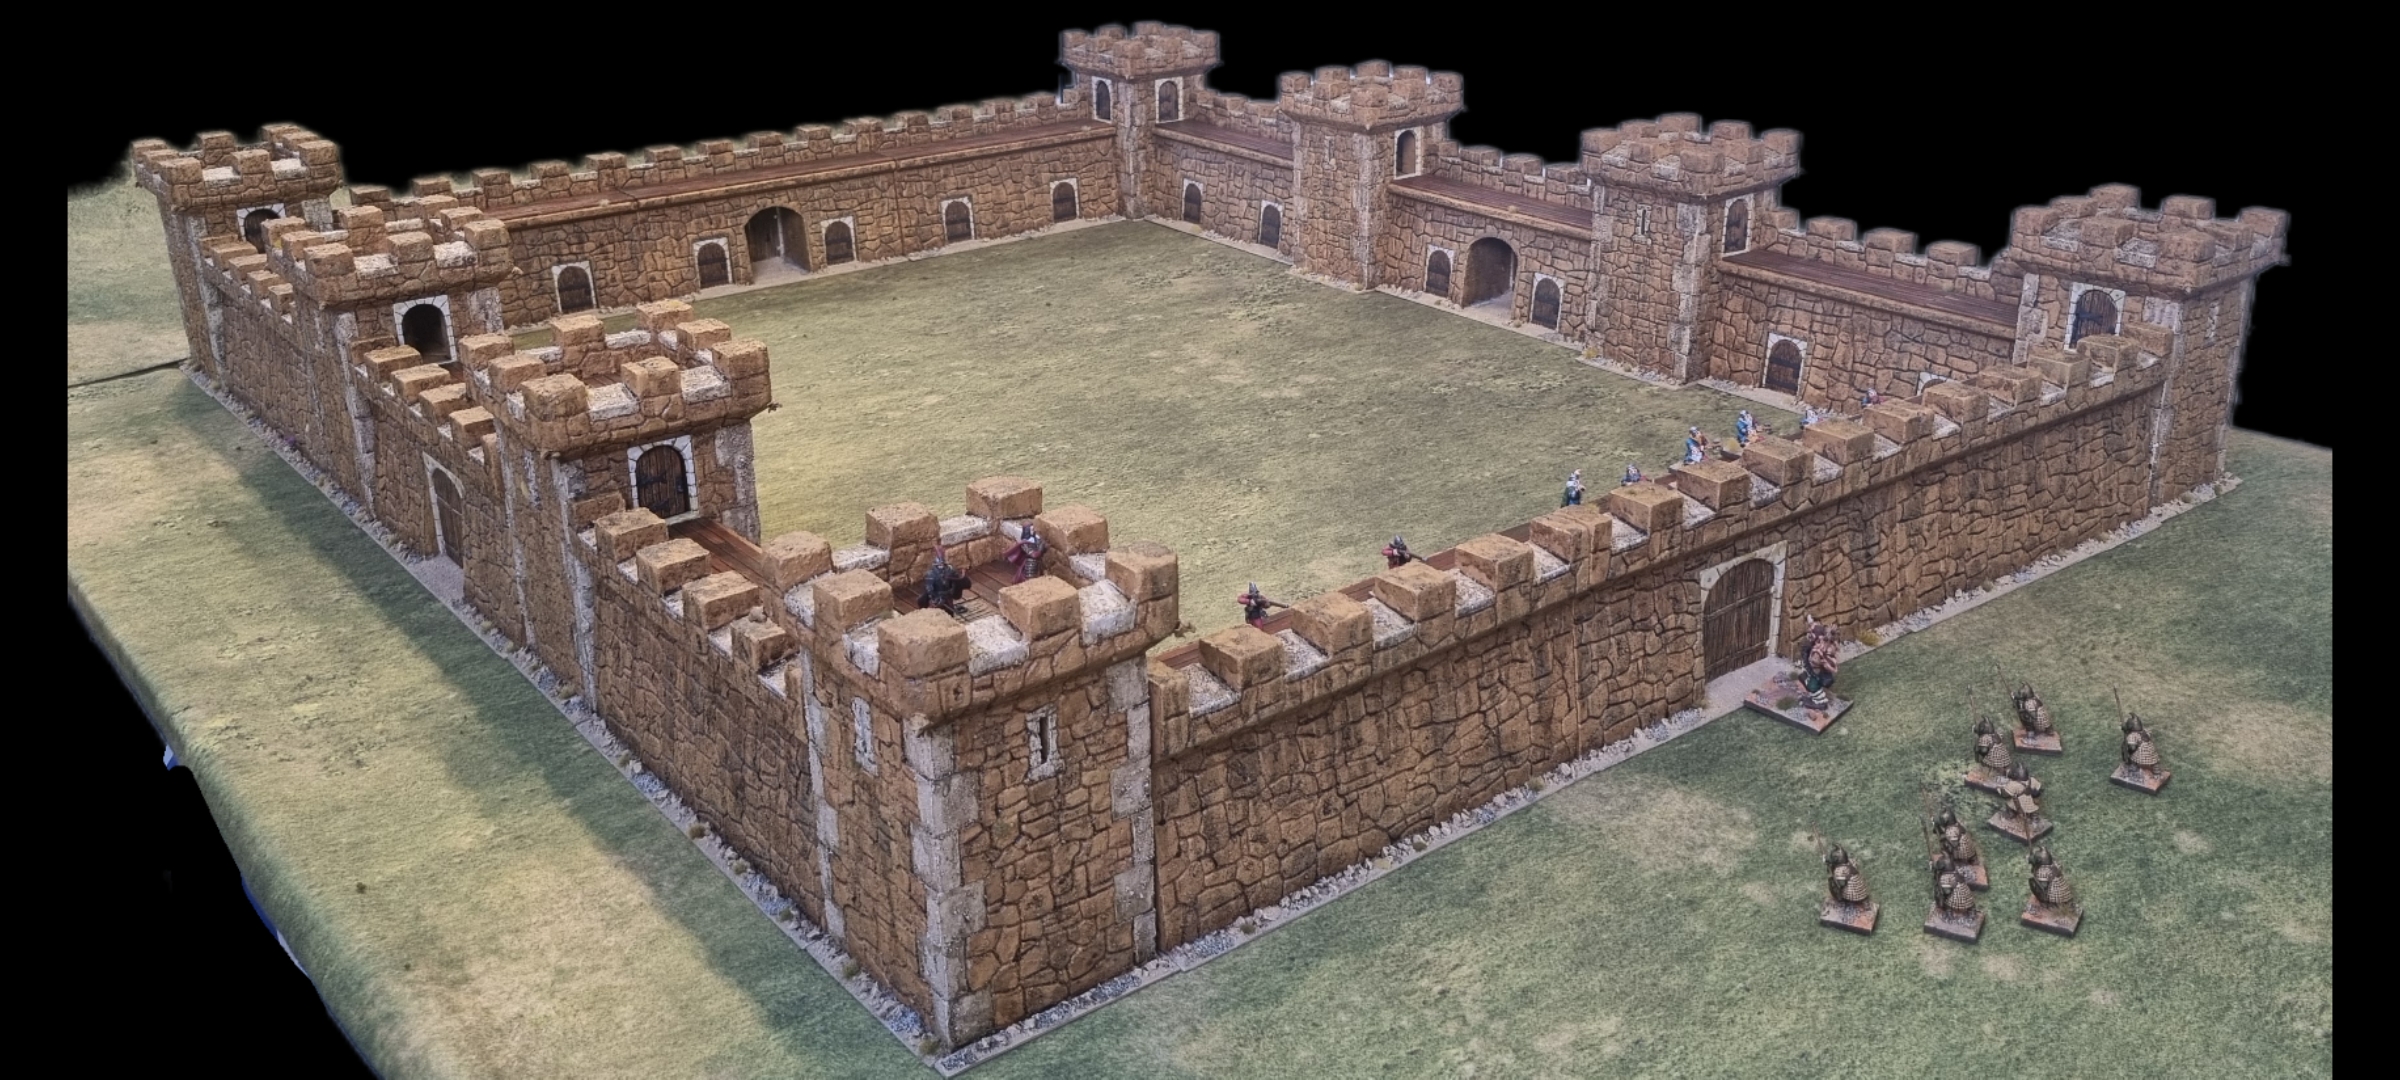
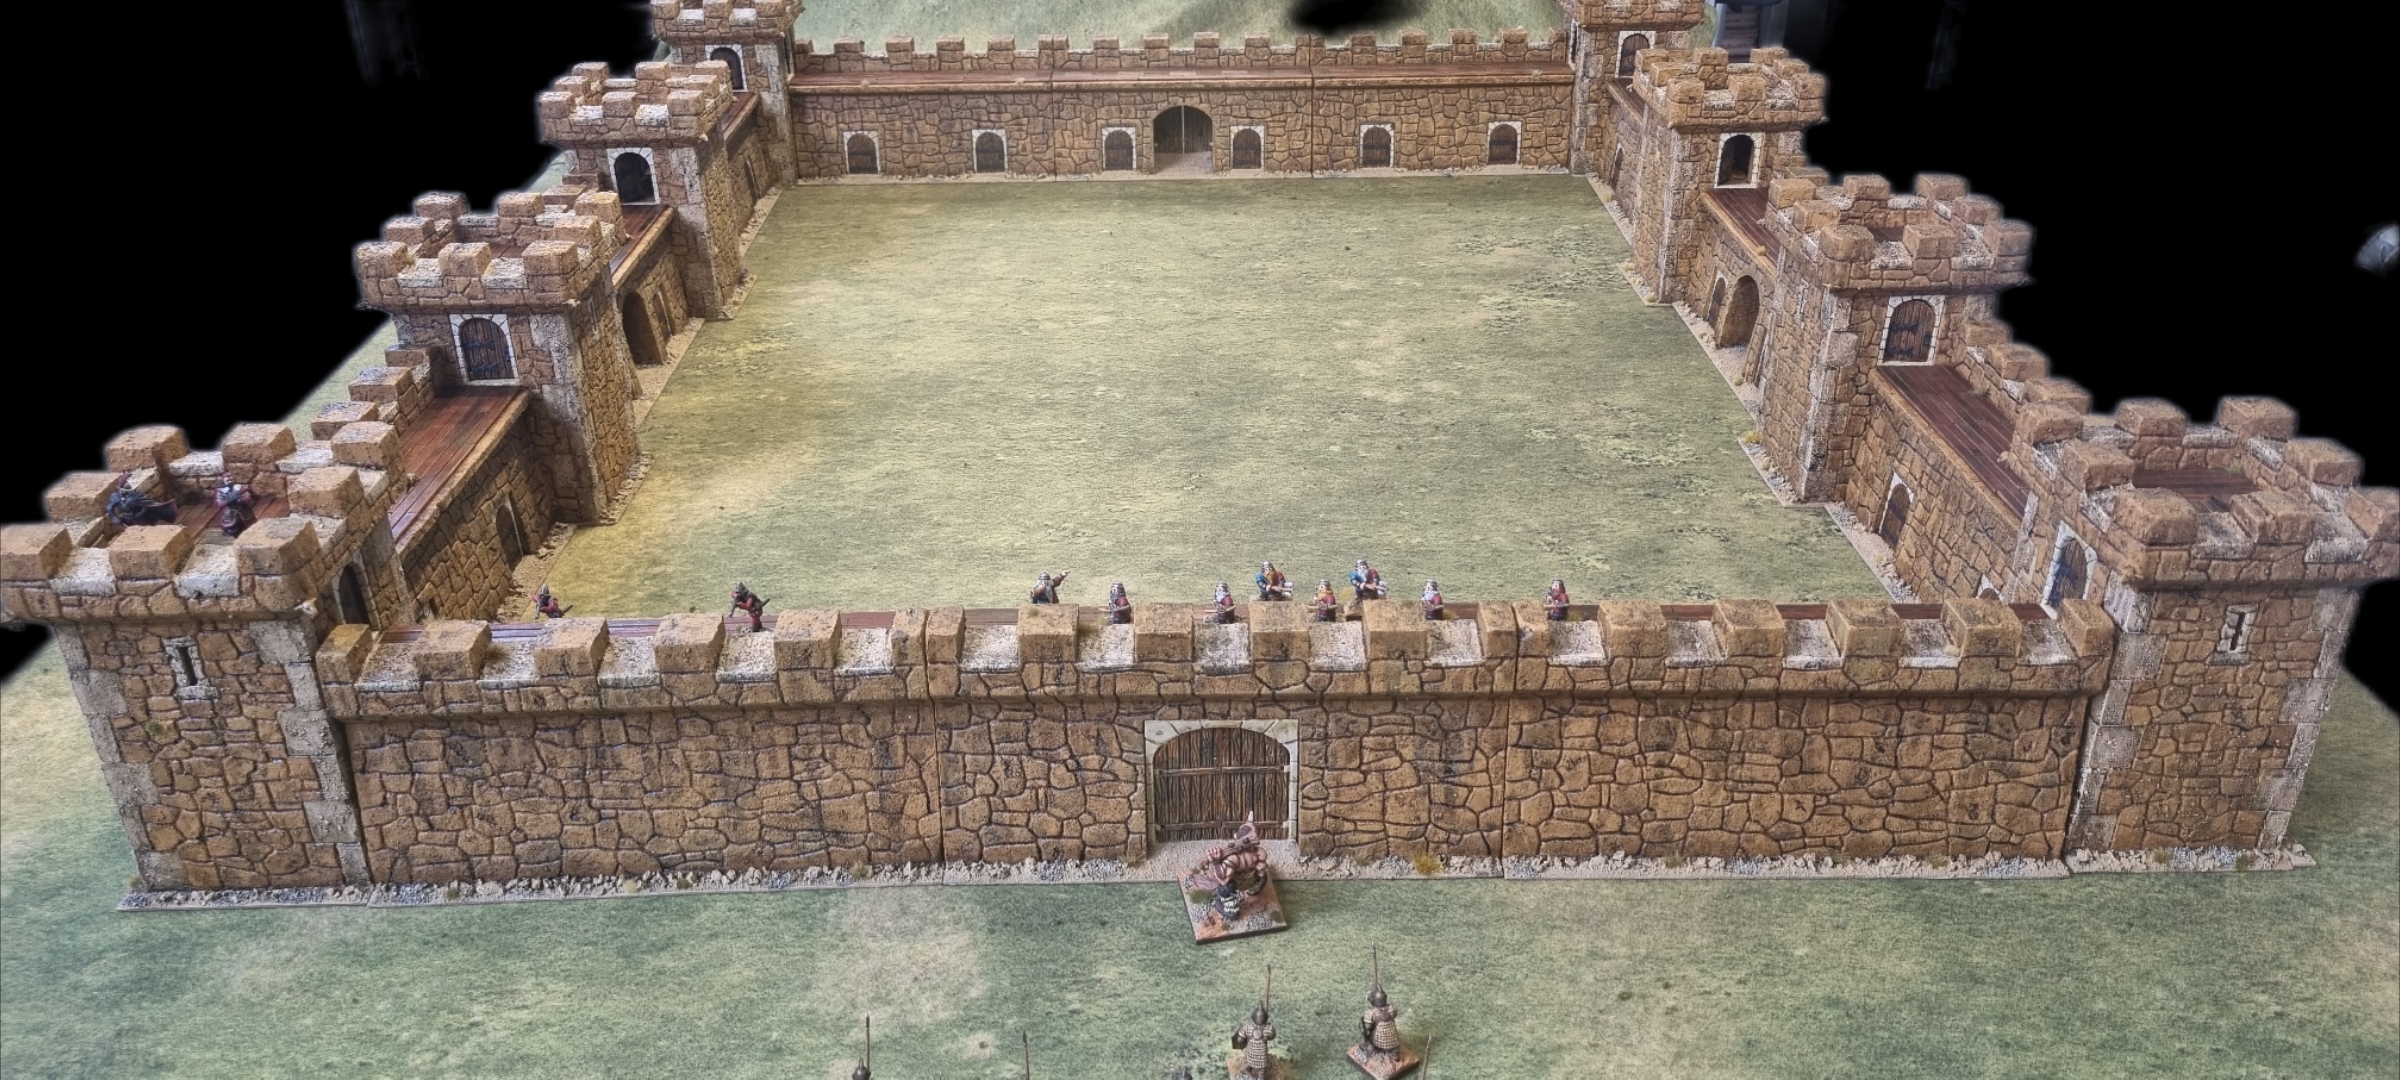
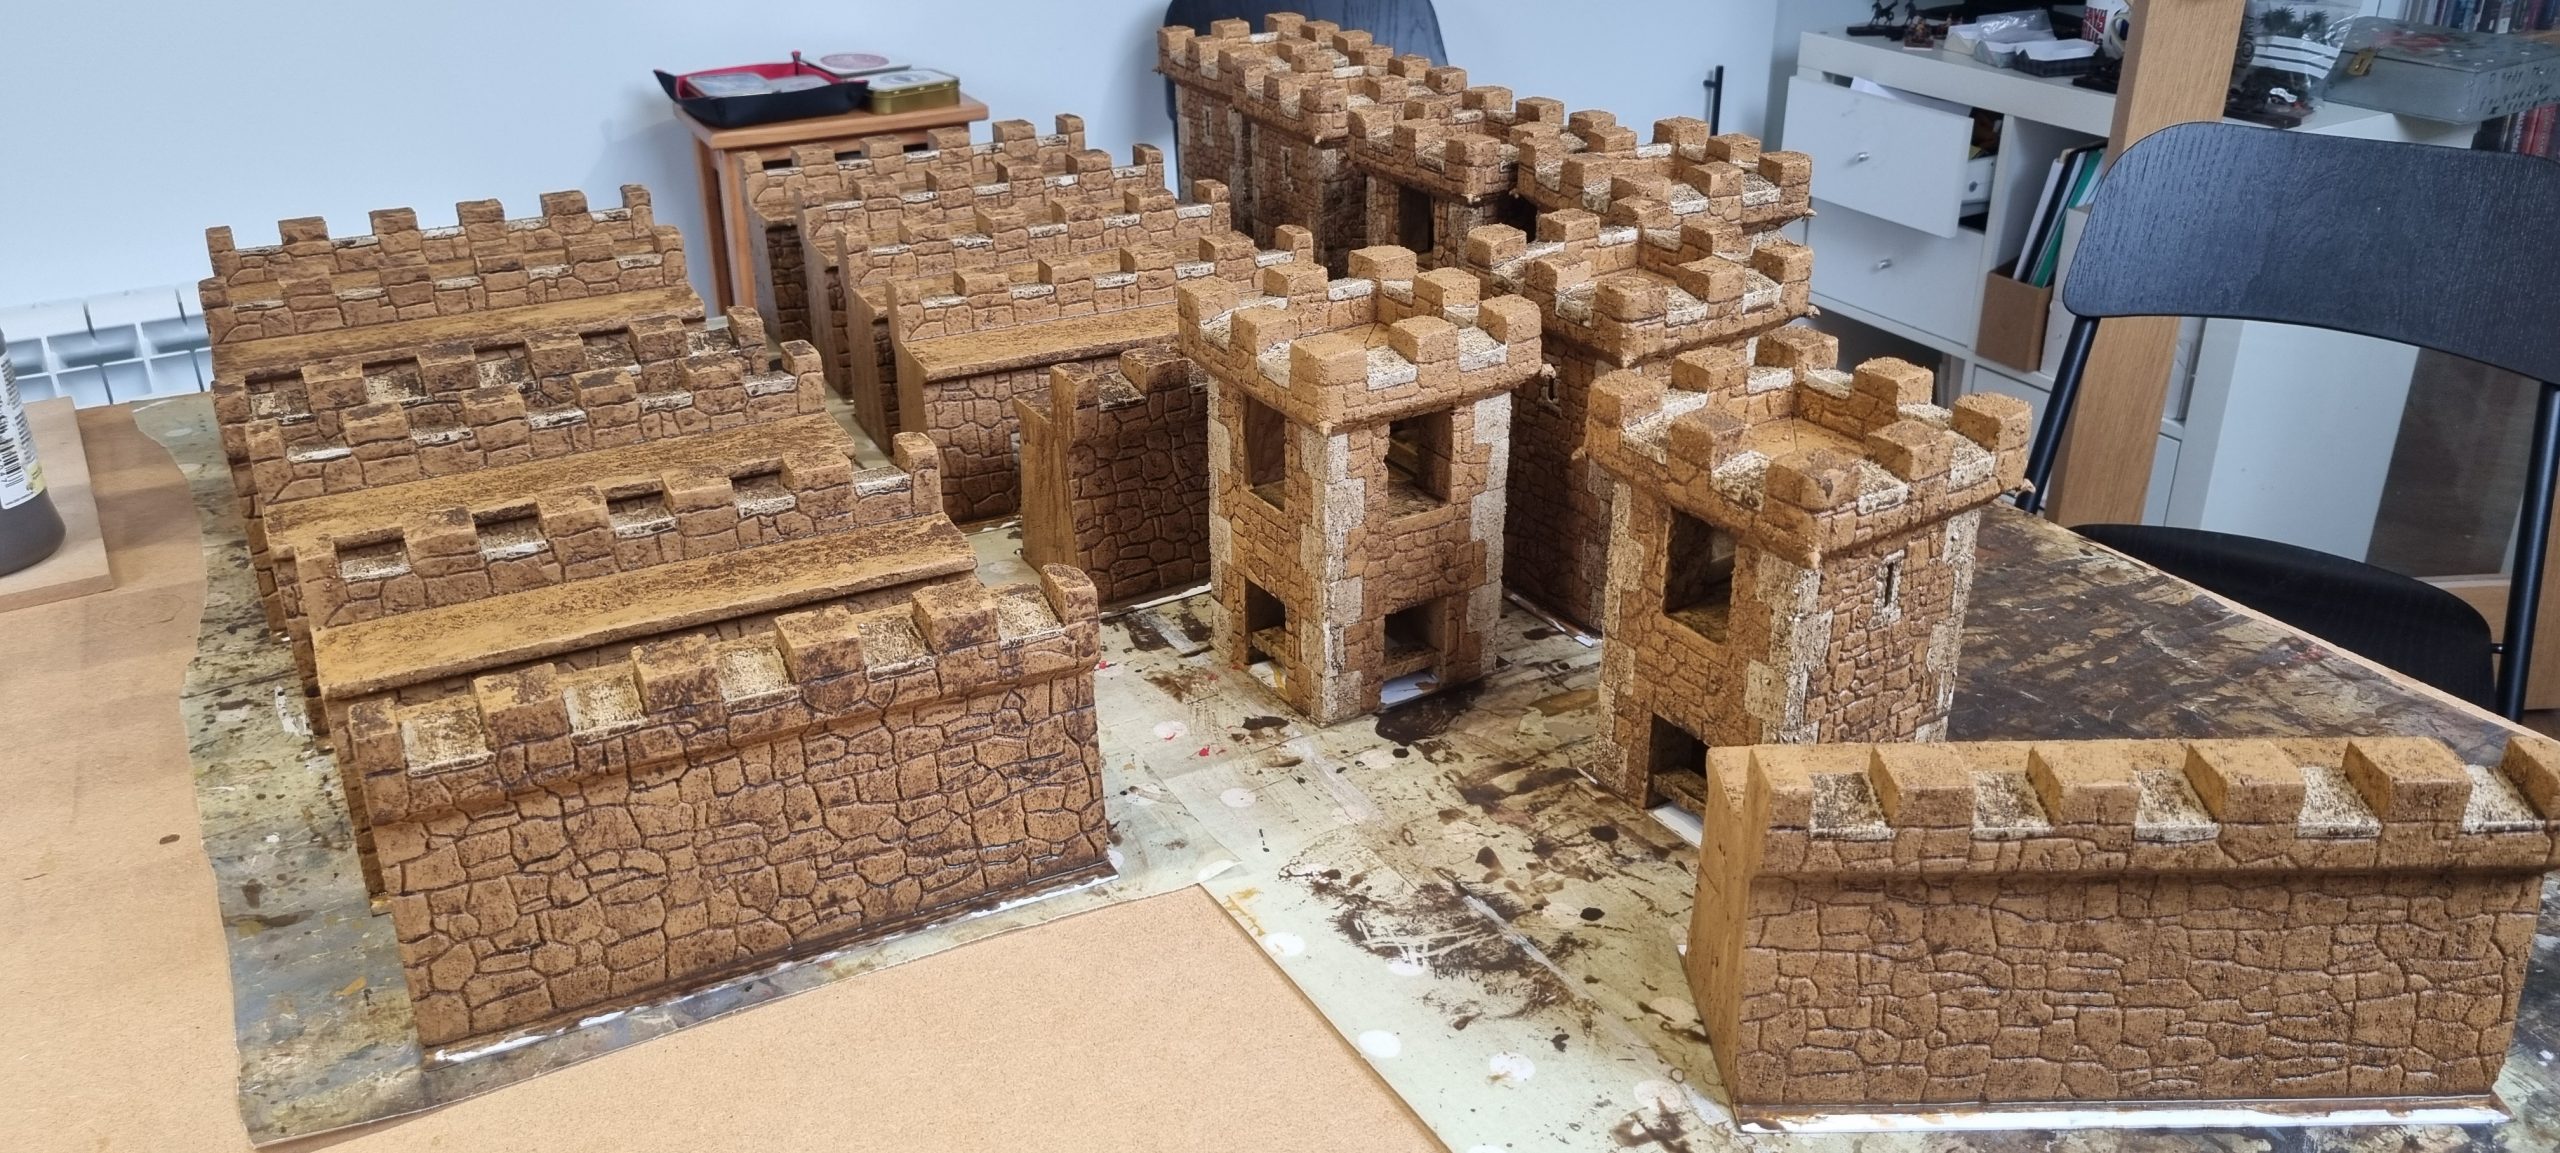
When we decided to play a large fantasy battle game at Ayton 2026, It seemed a good opportunity to finally get it painted. The scenario calls for a 6′ curtain wall running down one side of the table. I didn’t quite have enough walls. Only one solution – buy another ! They really are quite pricey nowadays but I managed to find a bargain that was missing a few pieces and slightly damaged – but perfect for my purposes.
Three months later it is finished. I intend to make some supplementary bits and pieces (banners, platforms, ladders, steps etc.) over the course of the next year but for now it is usable. I may do some test battles using Warhammer Siege which I have never managed to play despite owning it for years.
The Project
Preparation
The model is moulded in a soft polystyrene reminscent of packing material. If you visit Wargames Foundry they have the original aluminium master moulds on display in the shop.
First task in preparation was to remove the mould marks – small petal-like arrangements of dots at regular intervals across all the surfaces. Tedious, but easily done with a scalpel.
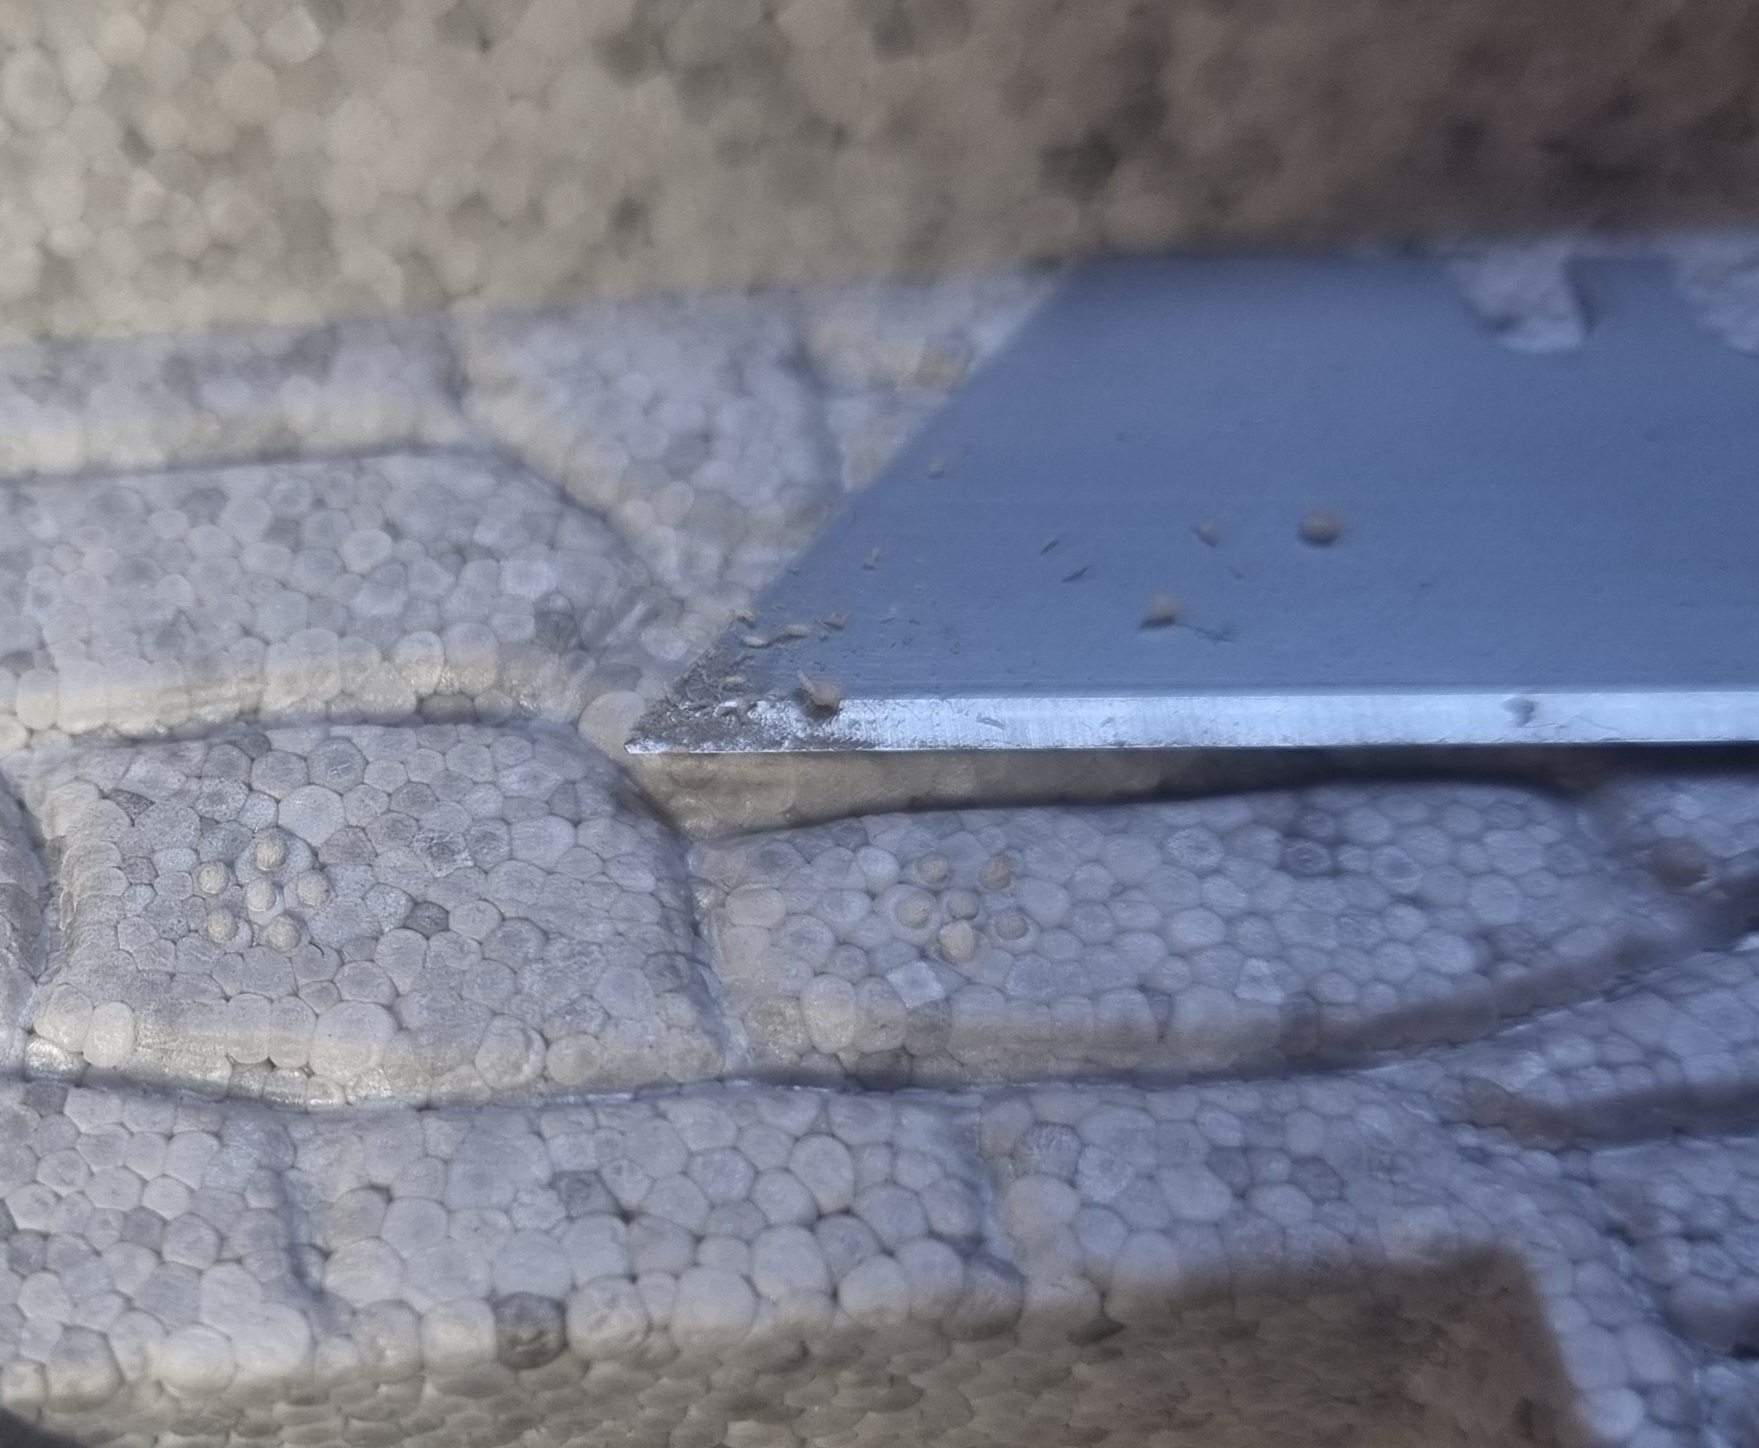
I also went over the moulded gaps between the stonework to better define them using a round-ended metal scultping tool.
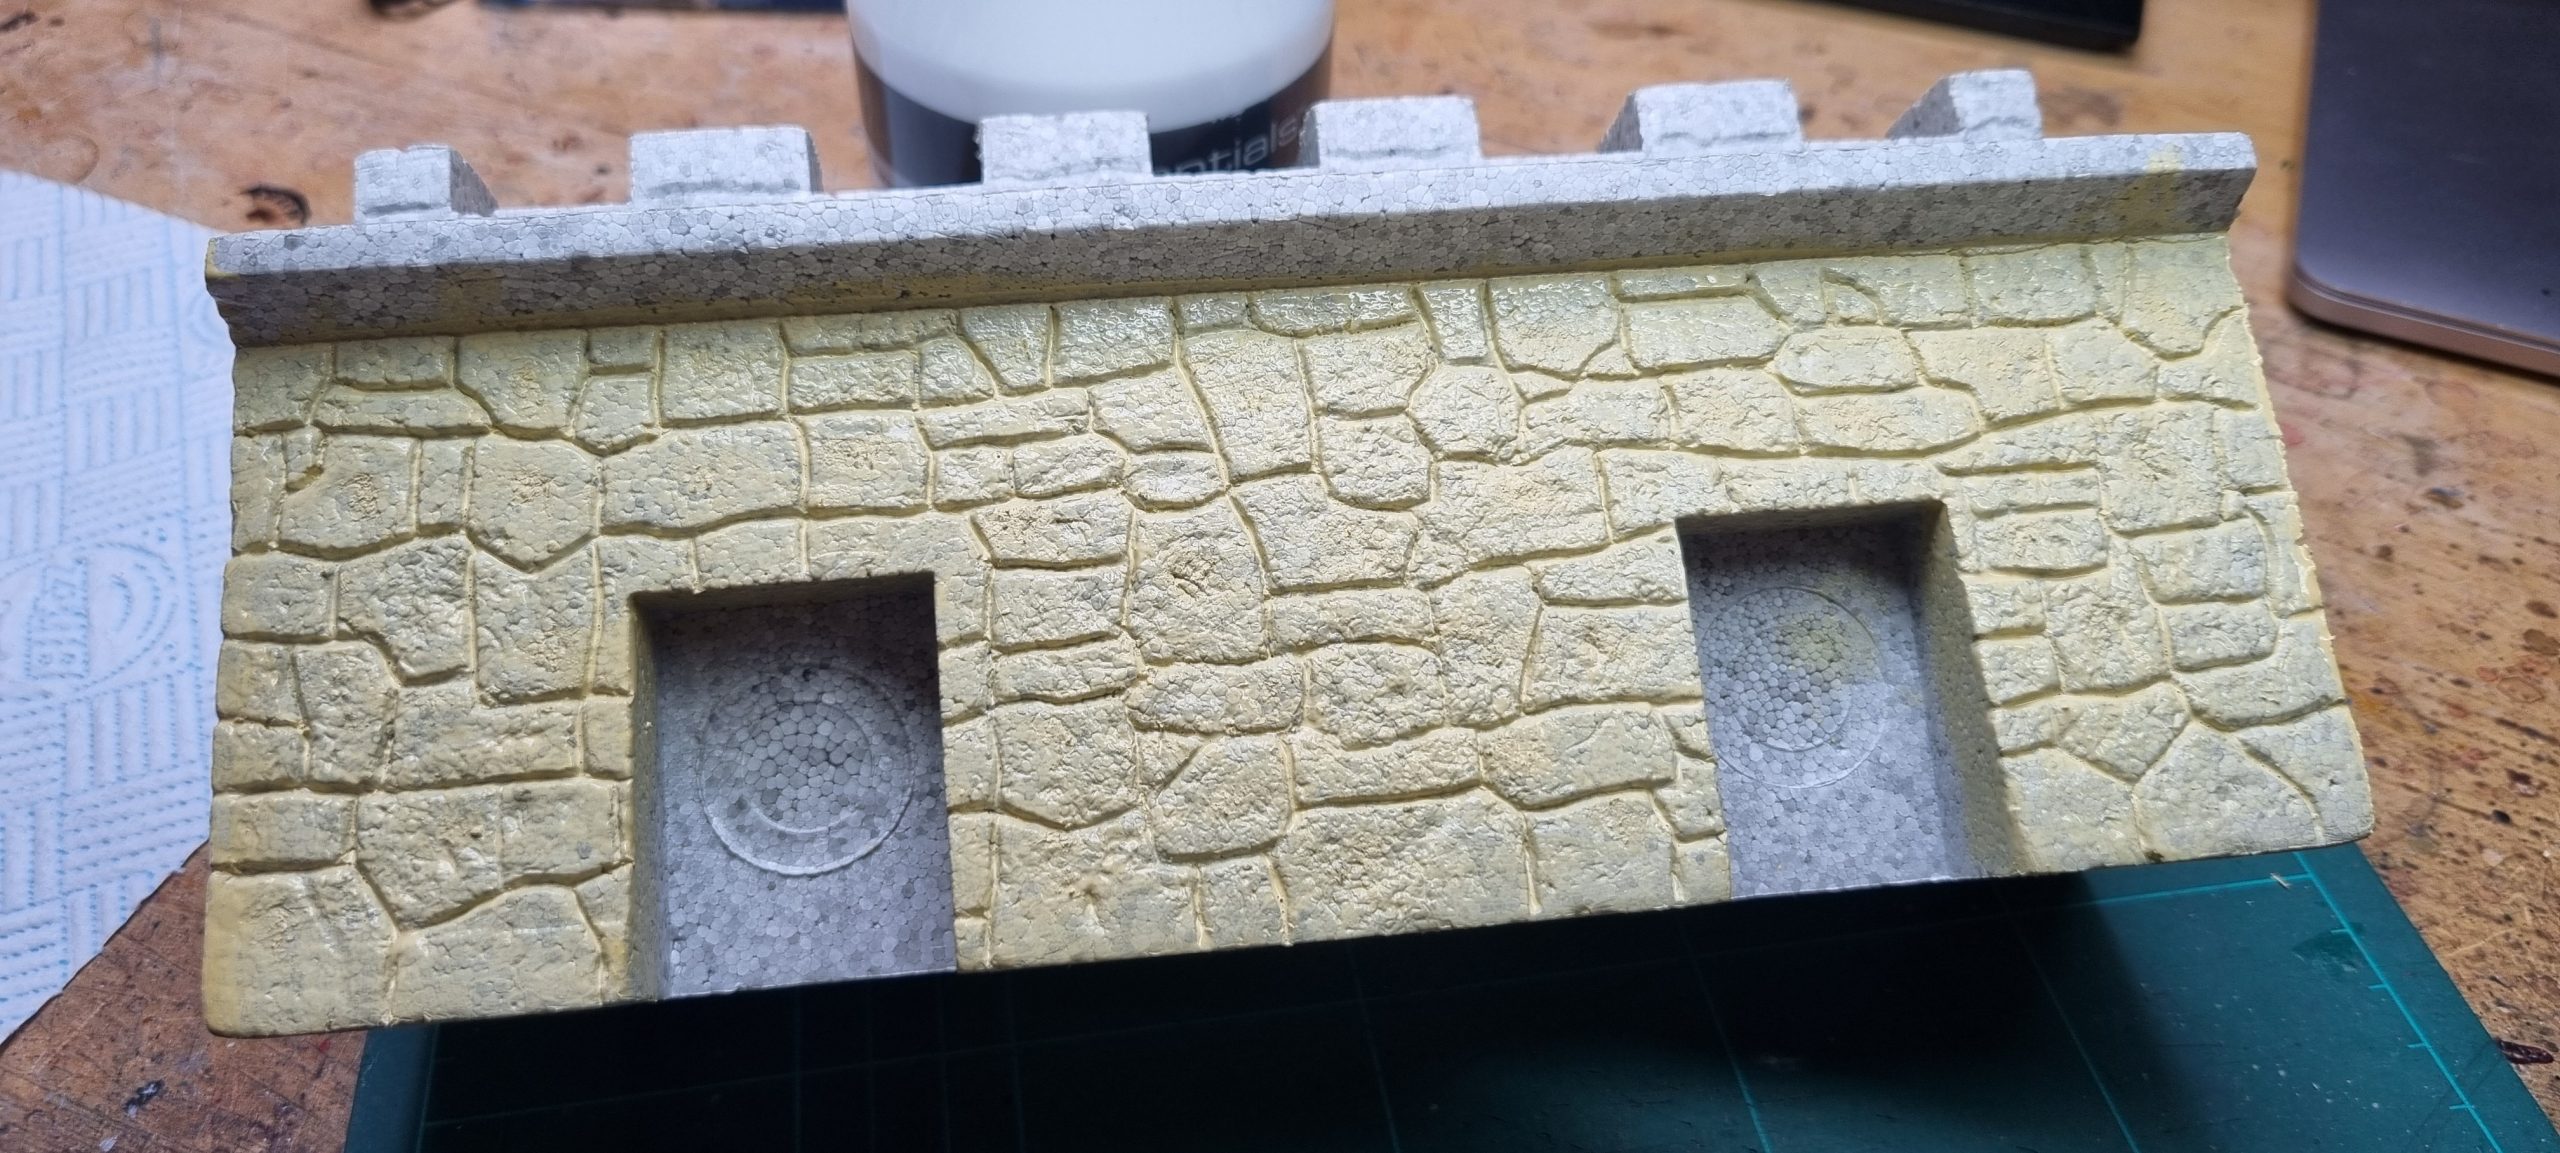
I was slightly concerned about the softness of the polystyrene and its ability to take paint so I started with a primer layer of gesso/pva and (pinch-of) sand mix.
Towers
The towers are push-fit with two door sides and two wall sides. You can put them into any configuration that you want (corner tower or straight wall). I think the idea was that they could be disassembled in between games. I would be concerned about the resilience of the pieces, but more importantly there are large diagonal gaps visible when pushed together. So, I decided to make permanent towers and fill the gaps with caulk and plastic wood, then sanded.
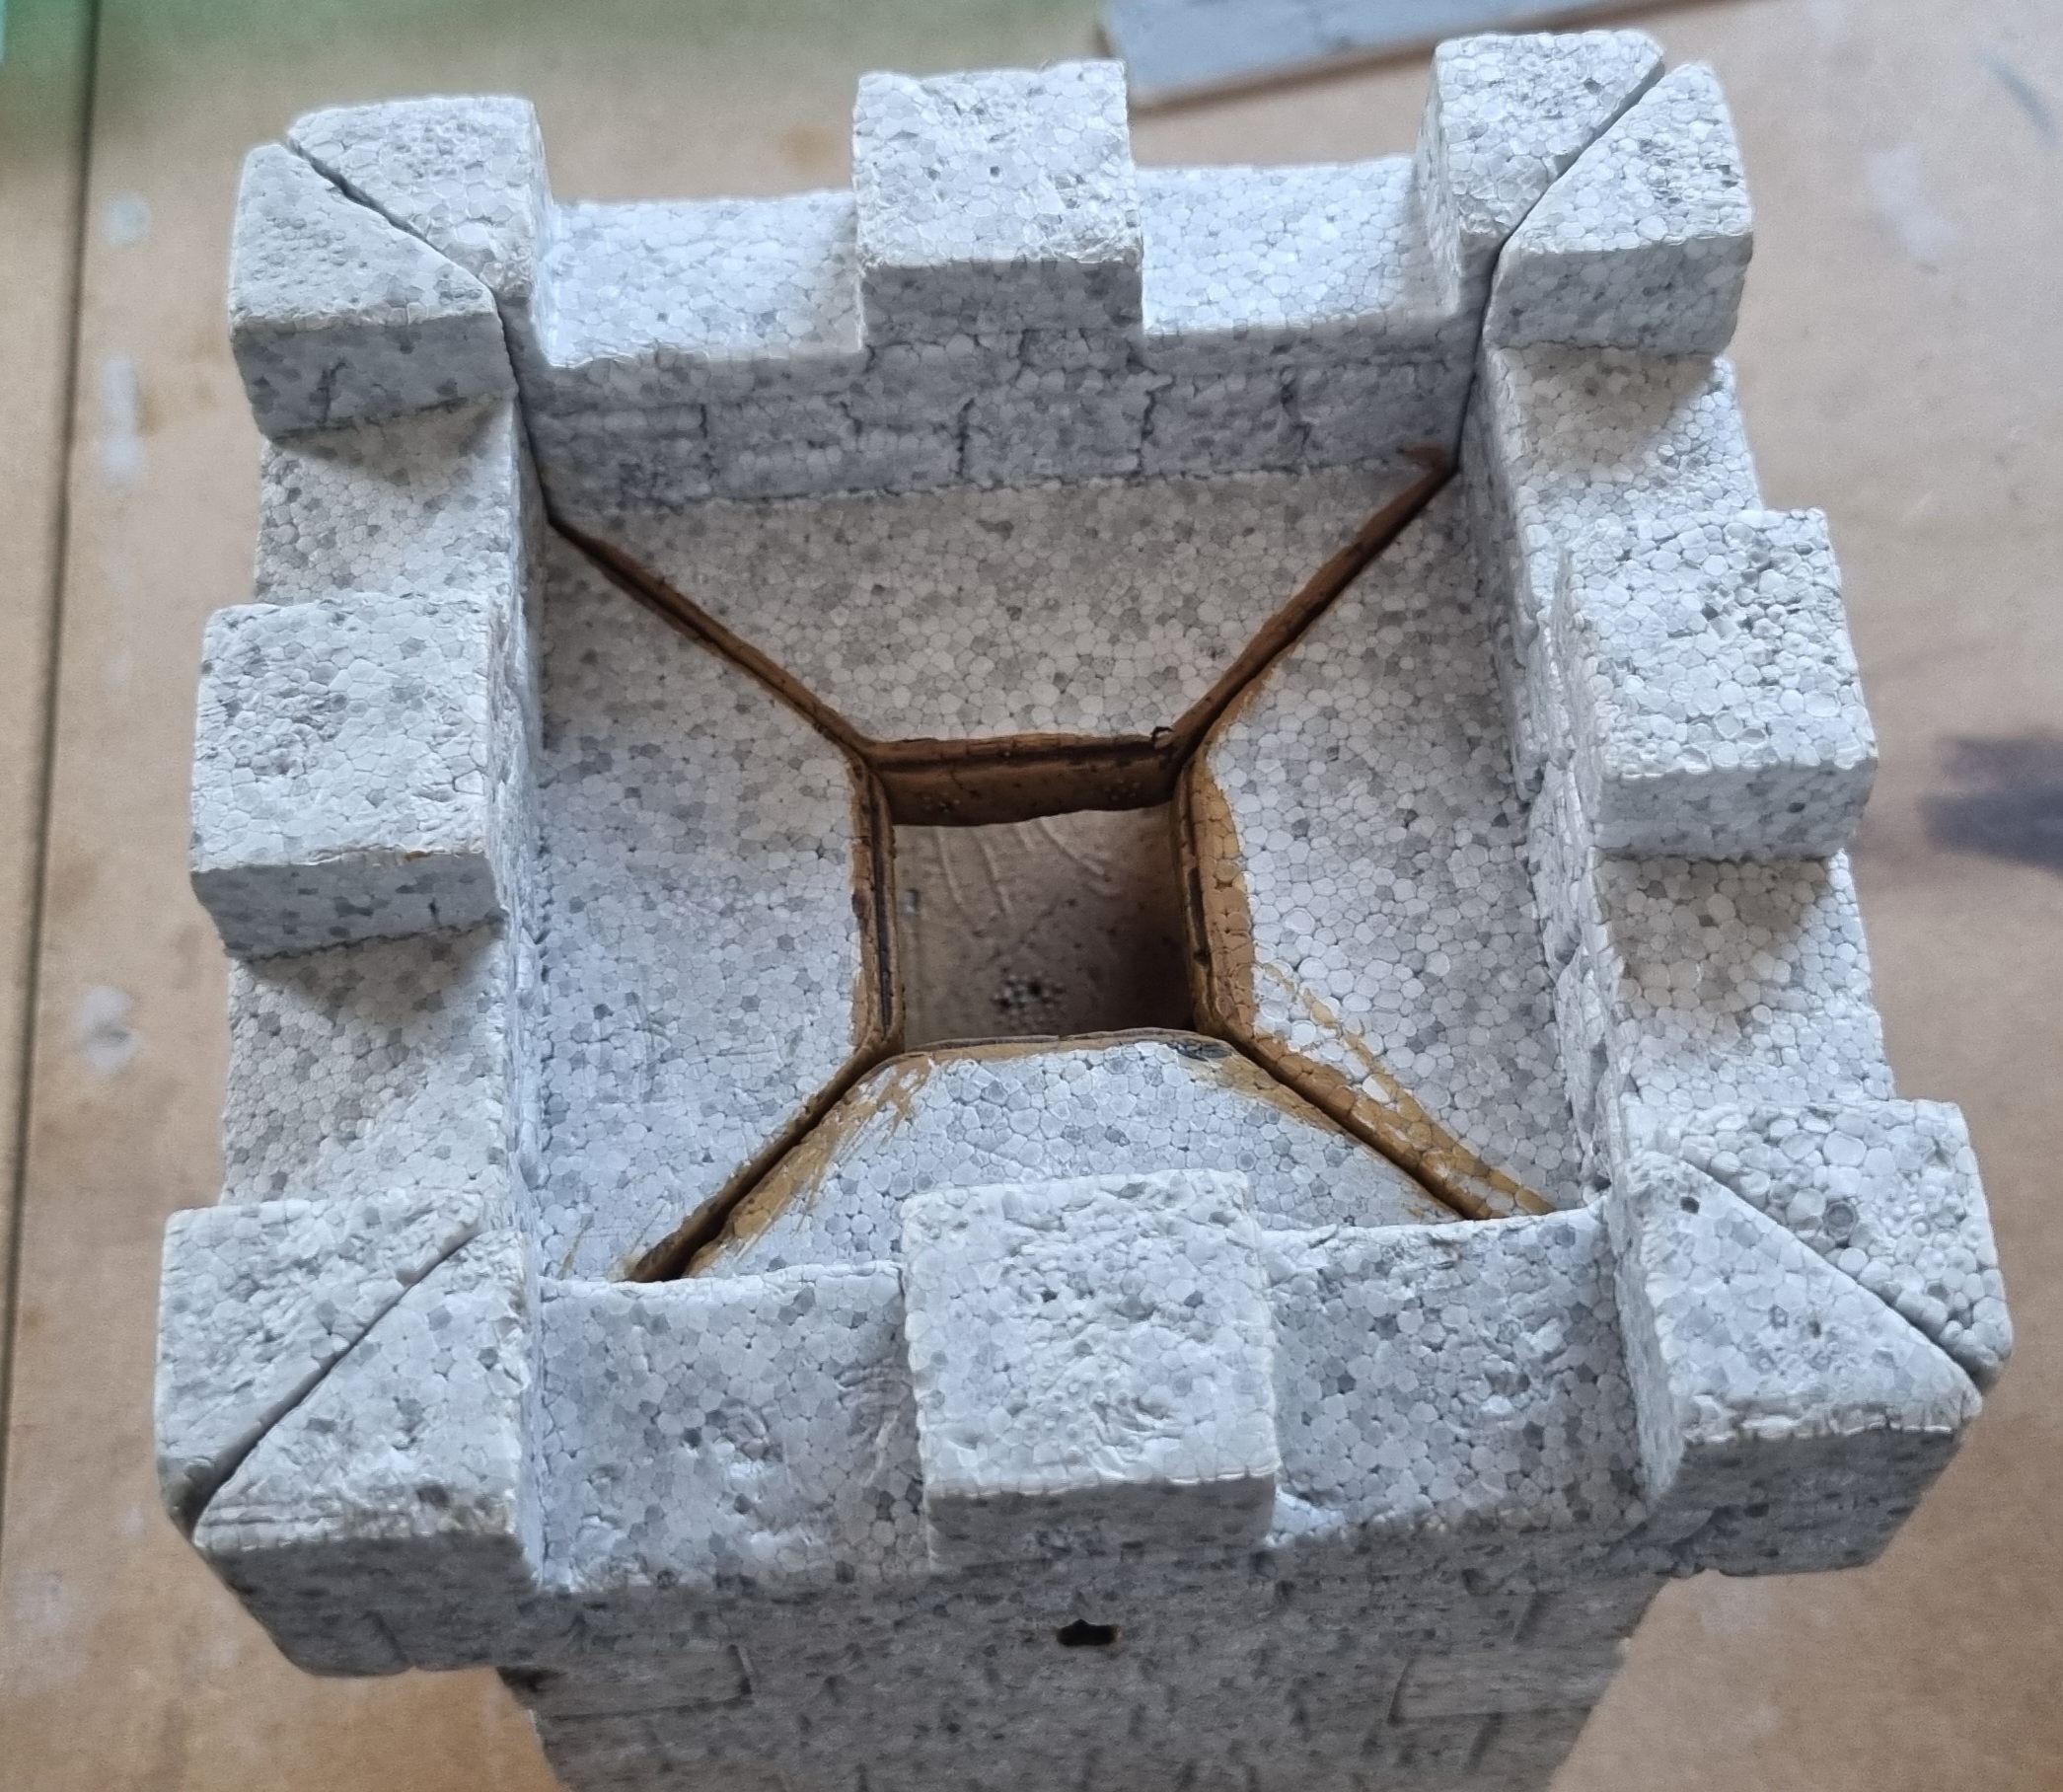

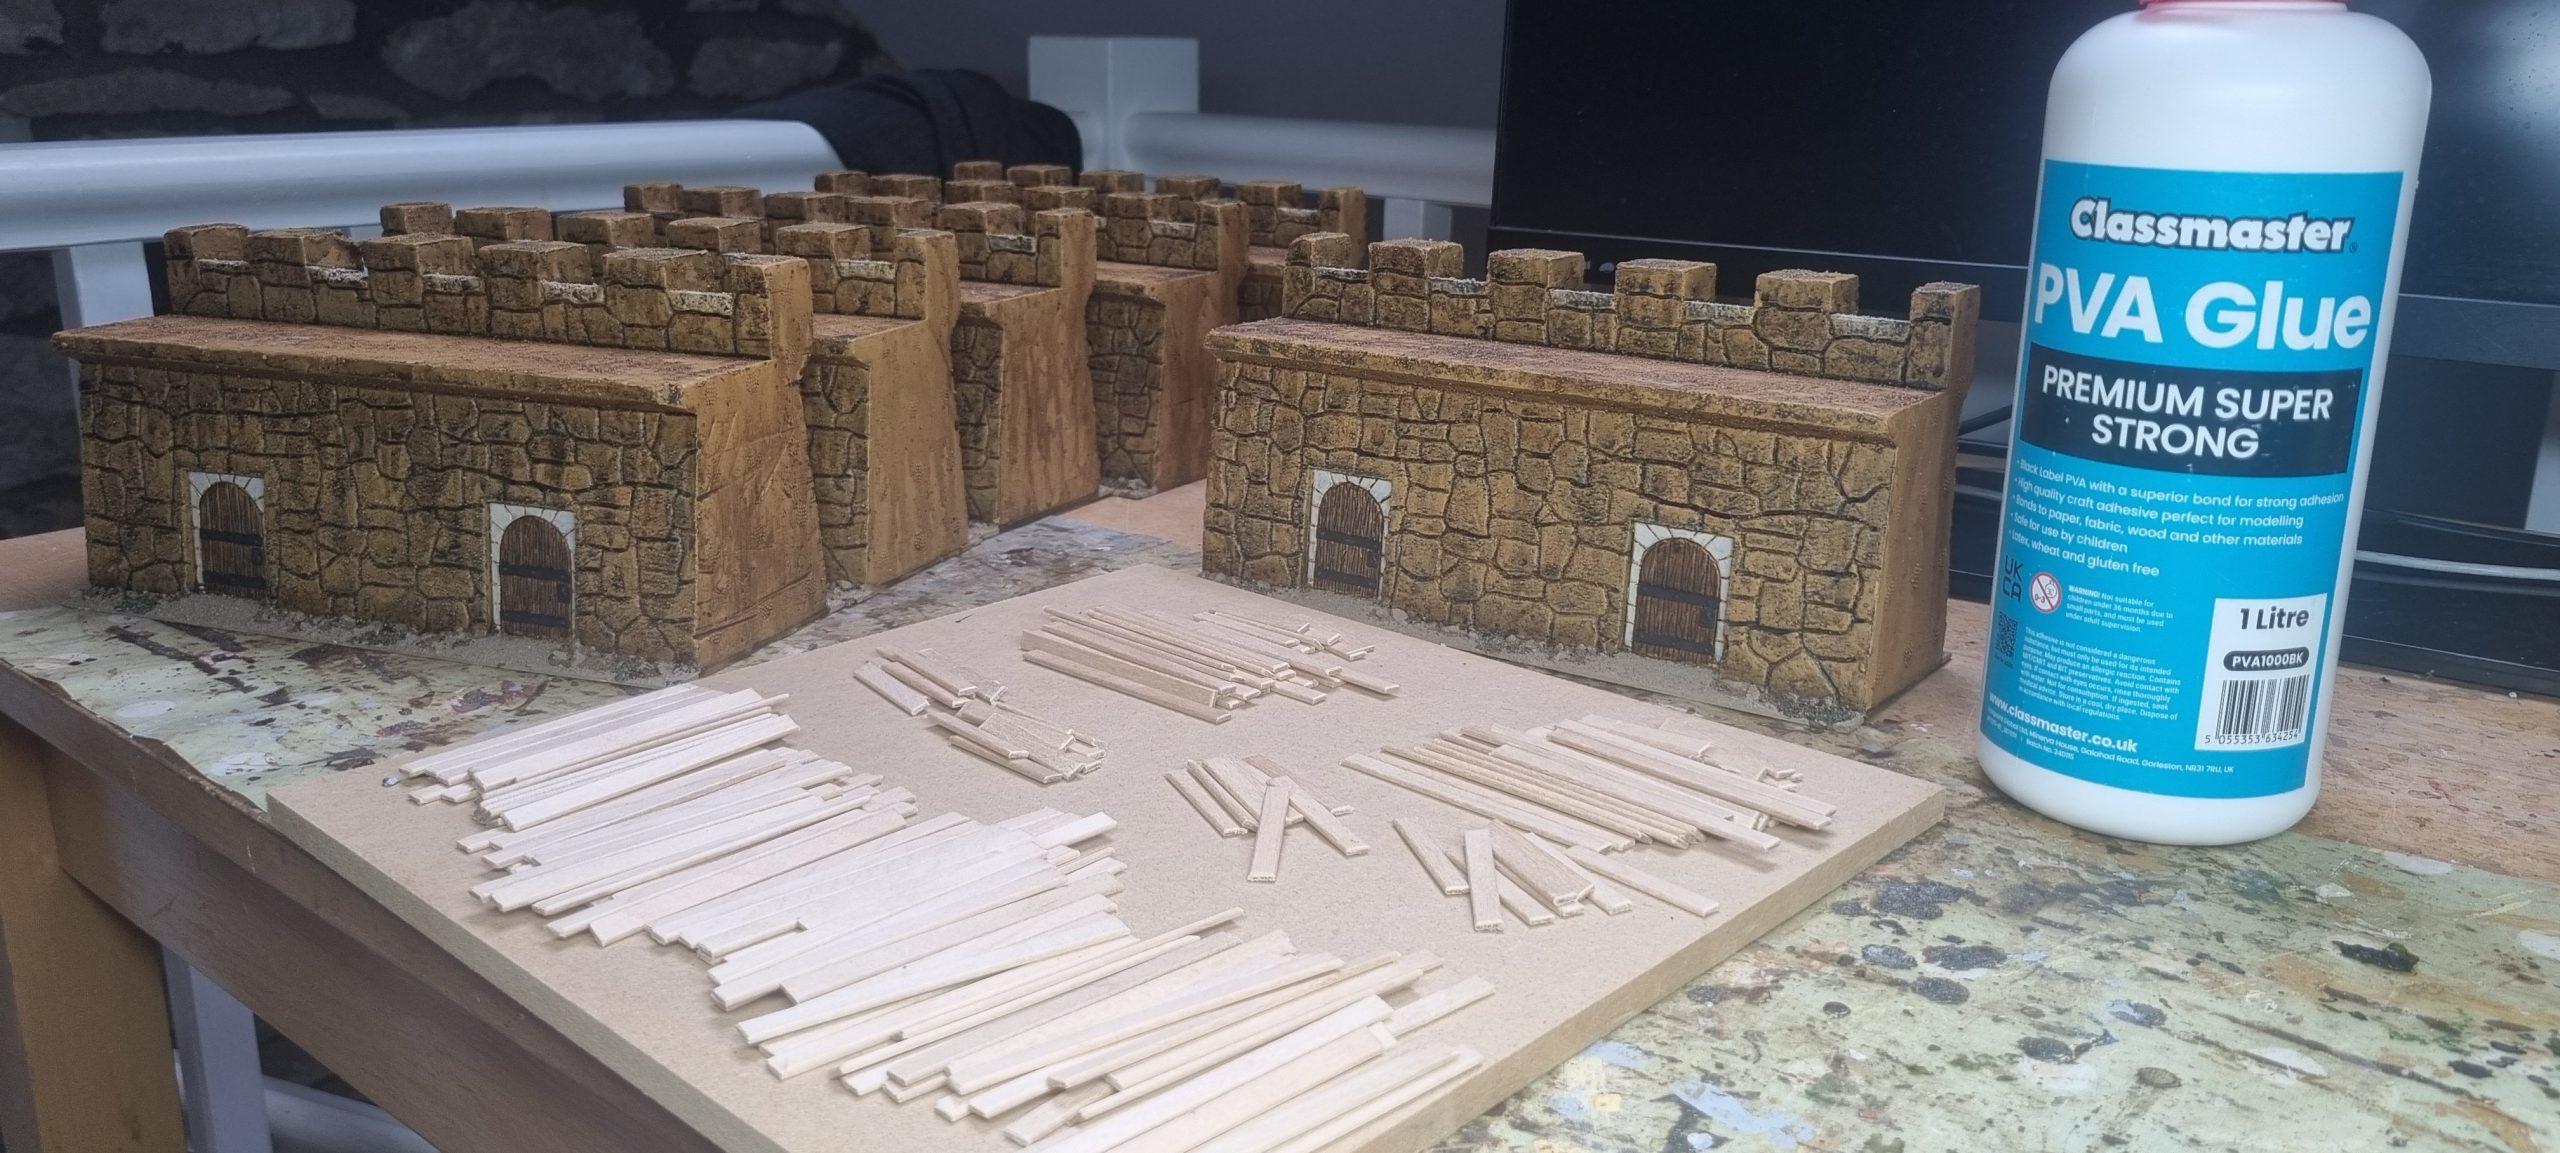
This still left the diagonal gaps on the roof. so the solution that seemed most elegant was to deck out the floor with planking (i.e. coffee stirrers).
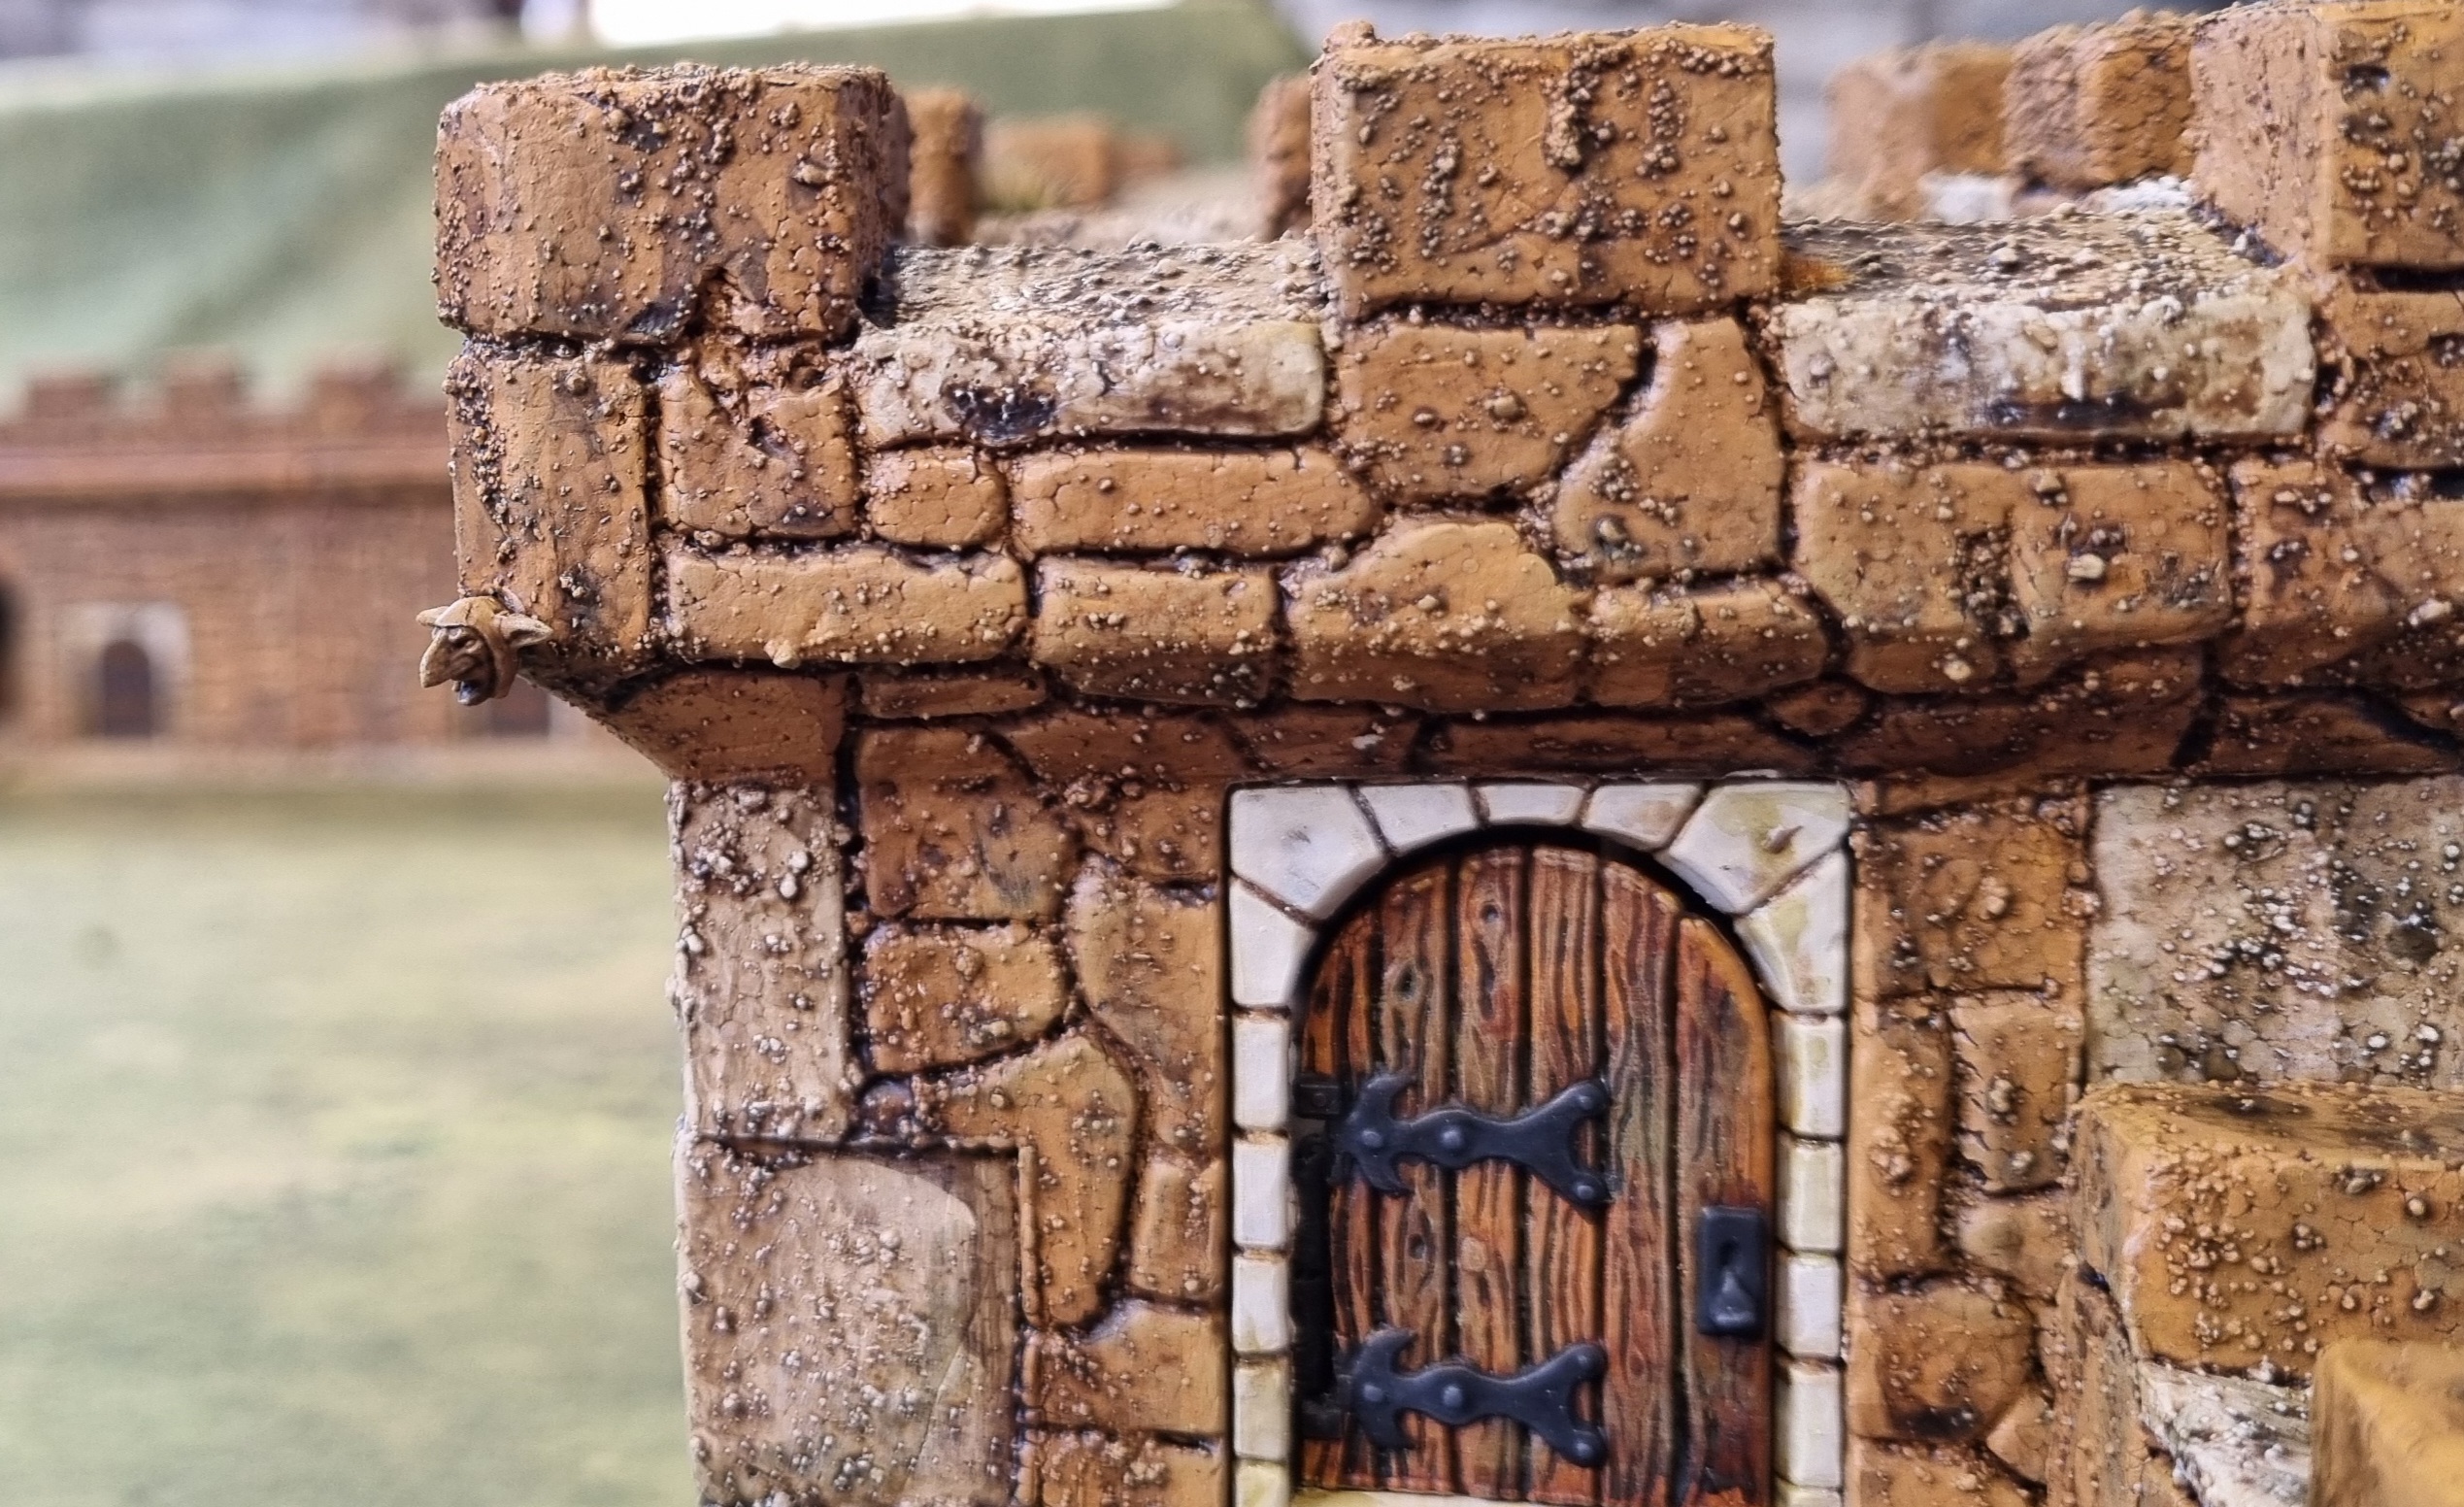
Tower Doors
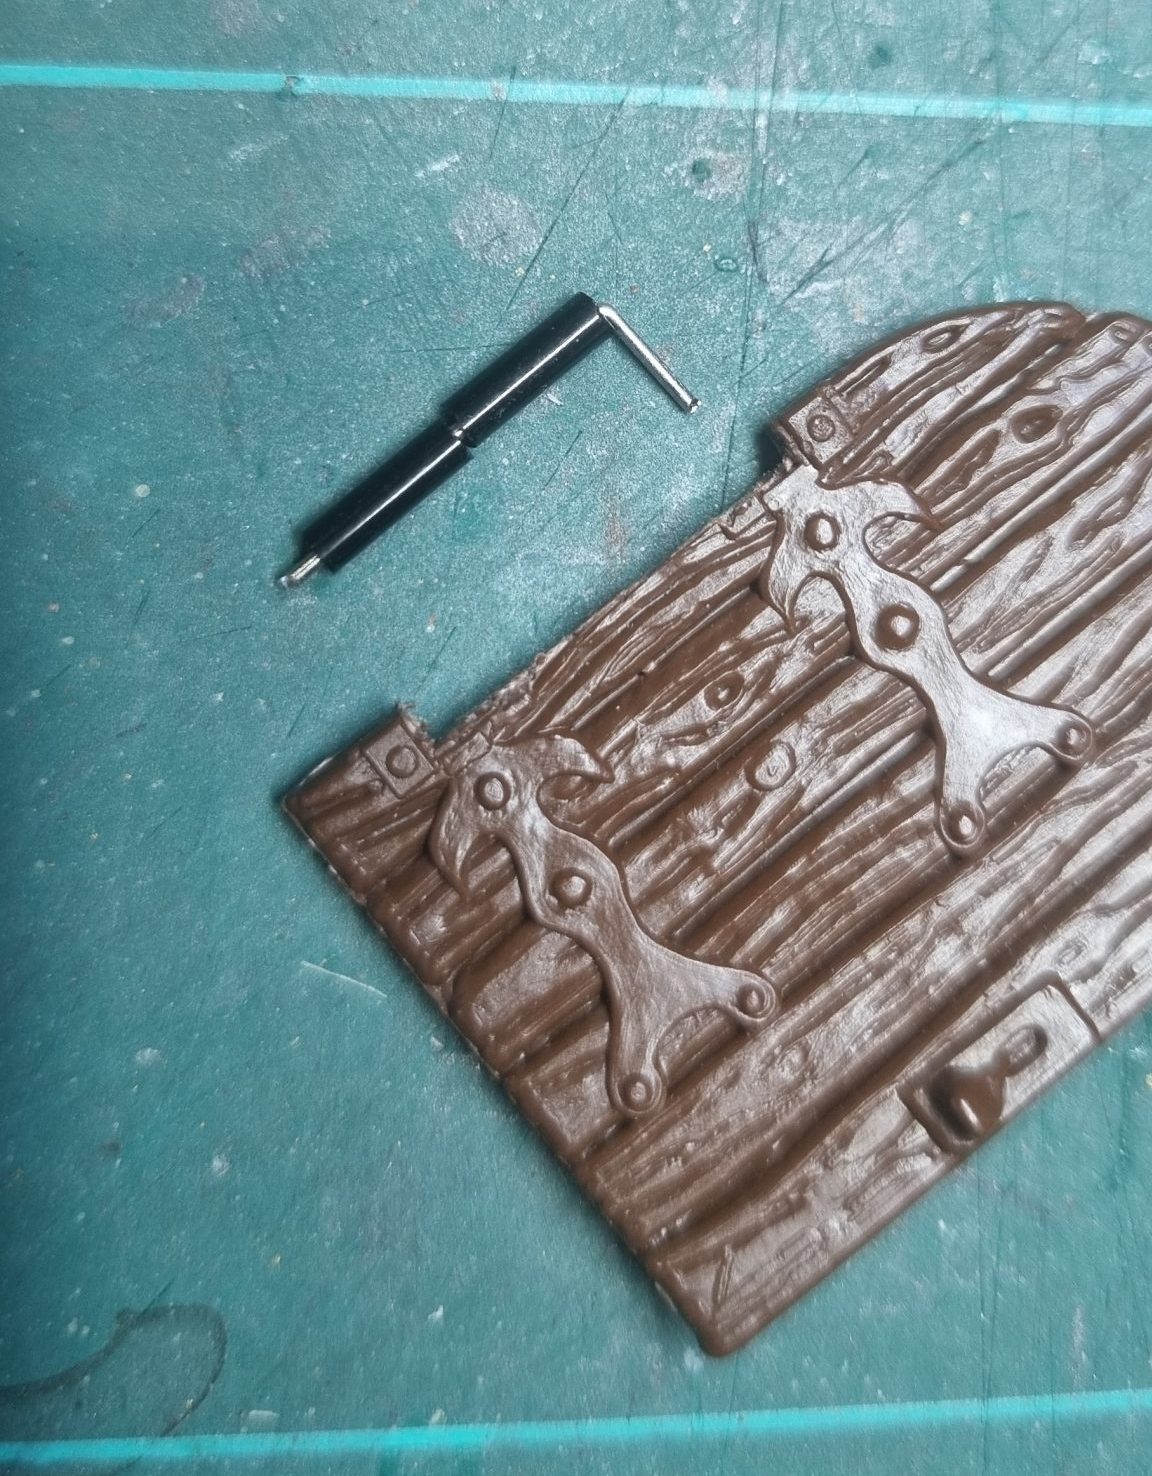
The hard plastic doors included in the box have a sort of push-fit hinge mechanism which doesn’t really grip properly. I had visions of doors constantly dropping off inside the towers and then getting stuck. I did consider just gluing them shut. But why make life easy ? Then I found a dolls house video where they made hinges using hollow beads and bent pins. Solution !
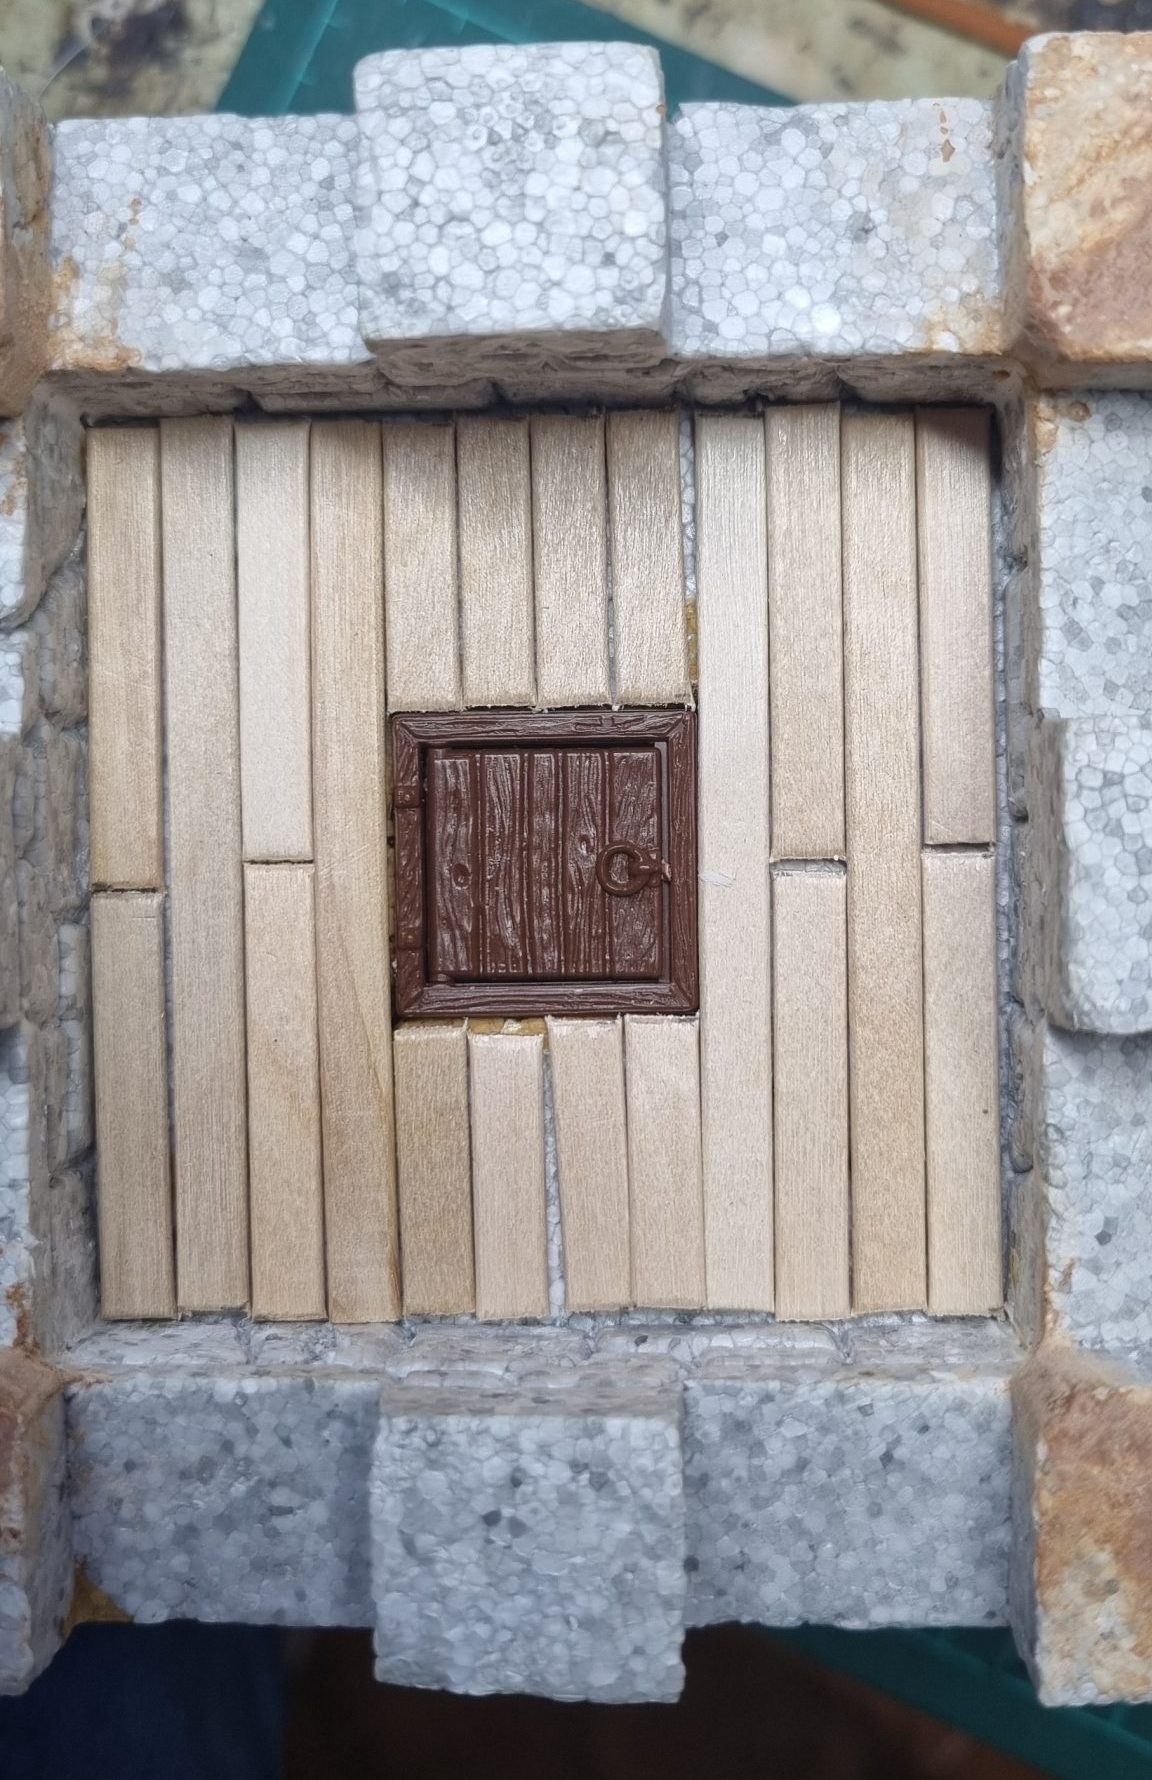
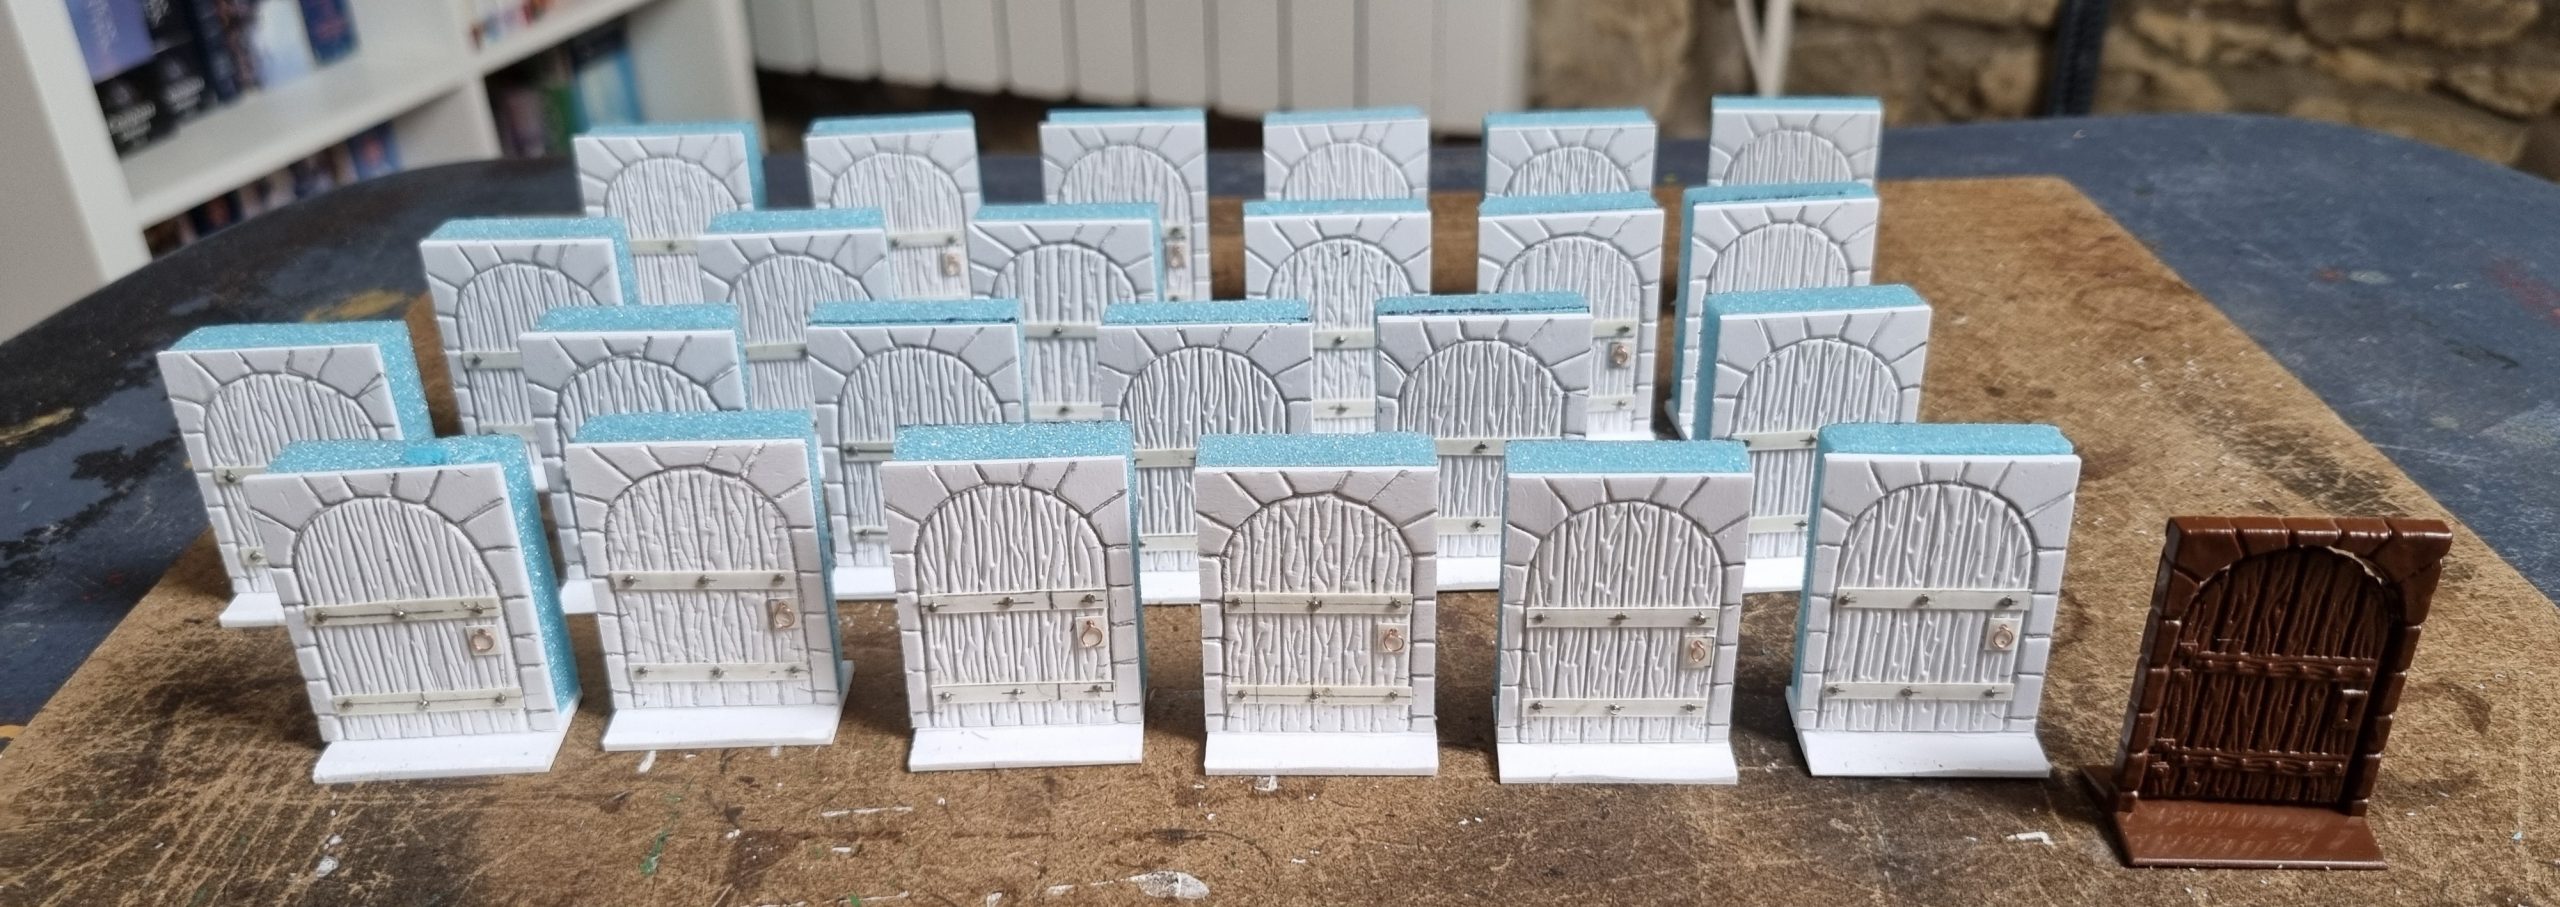
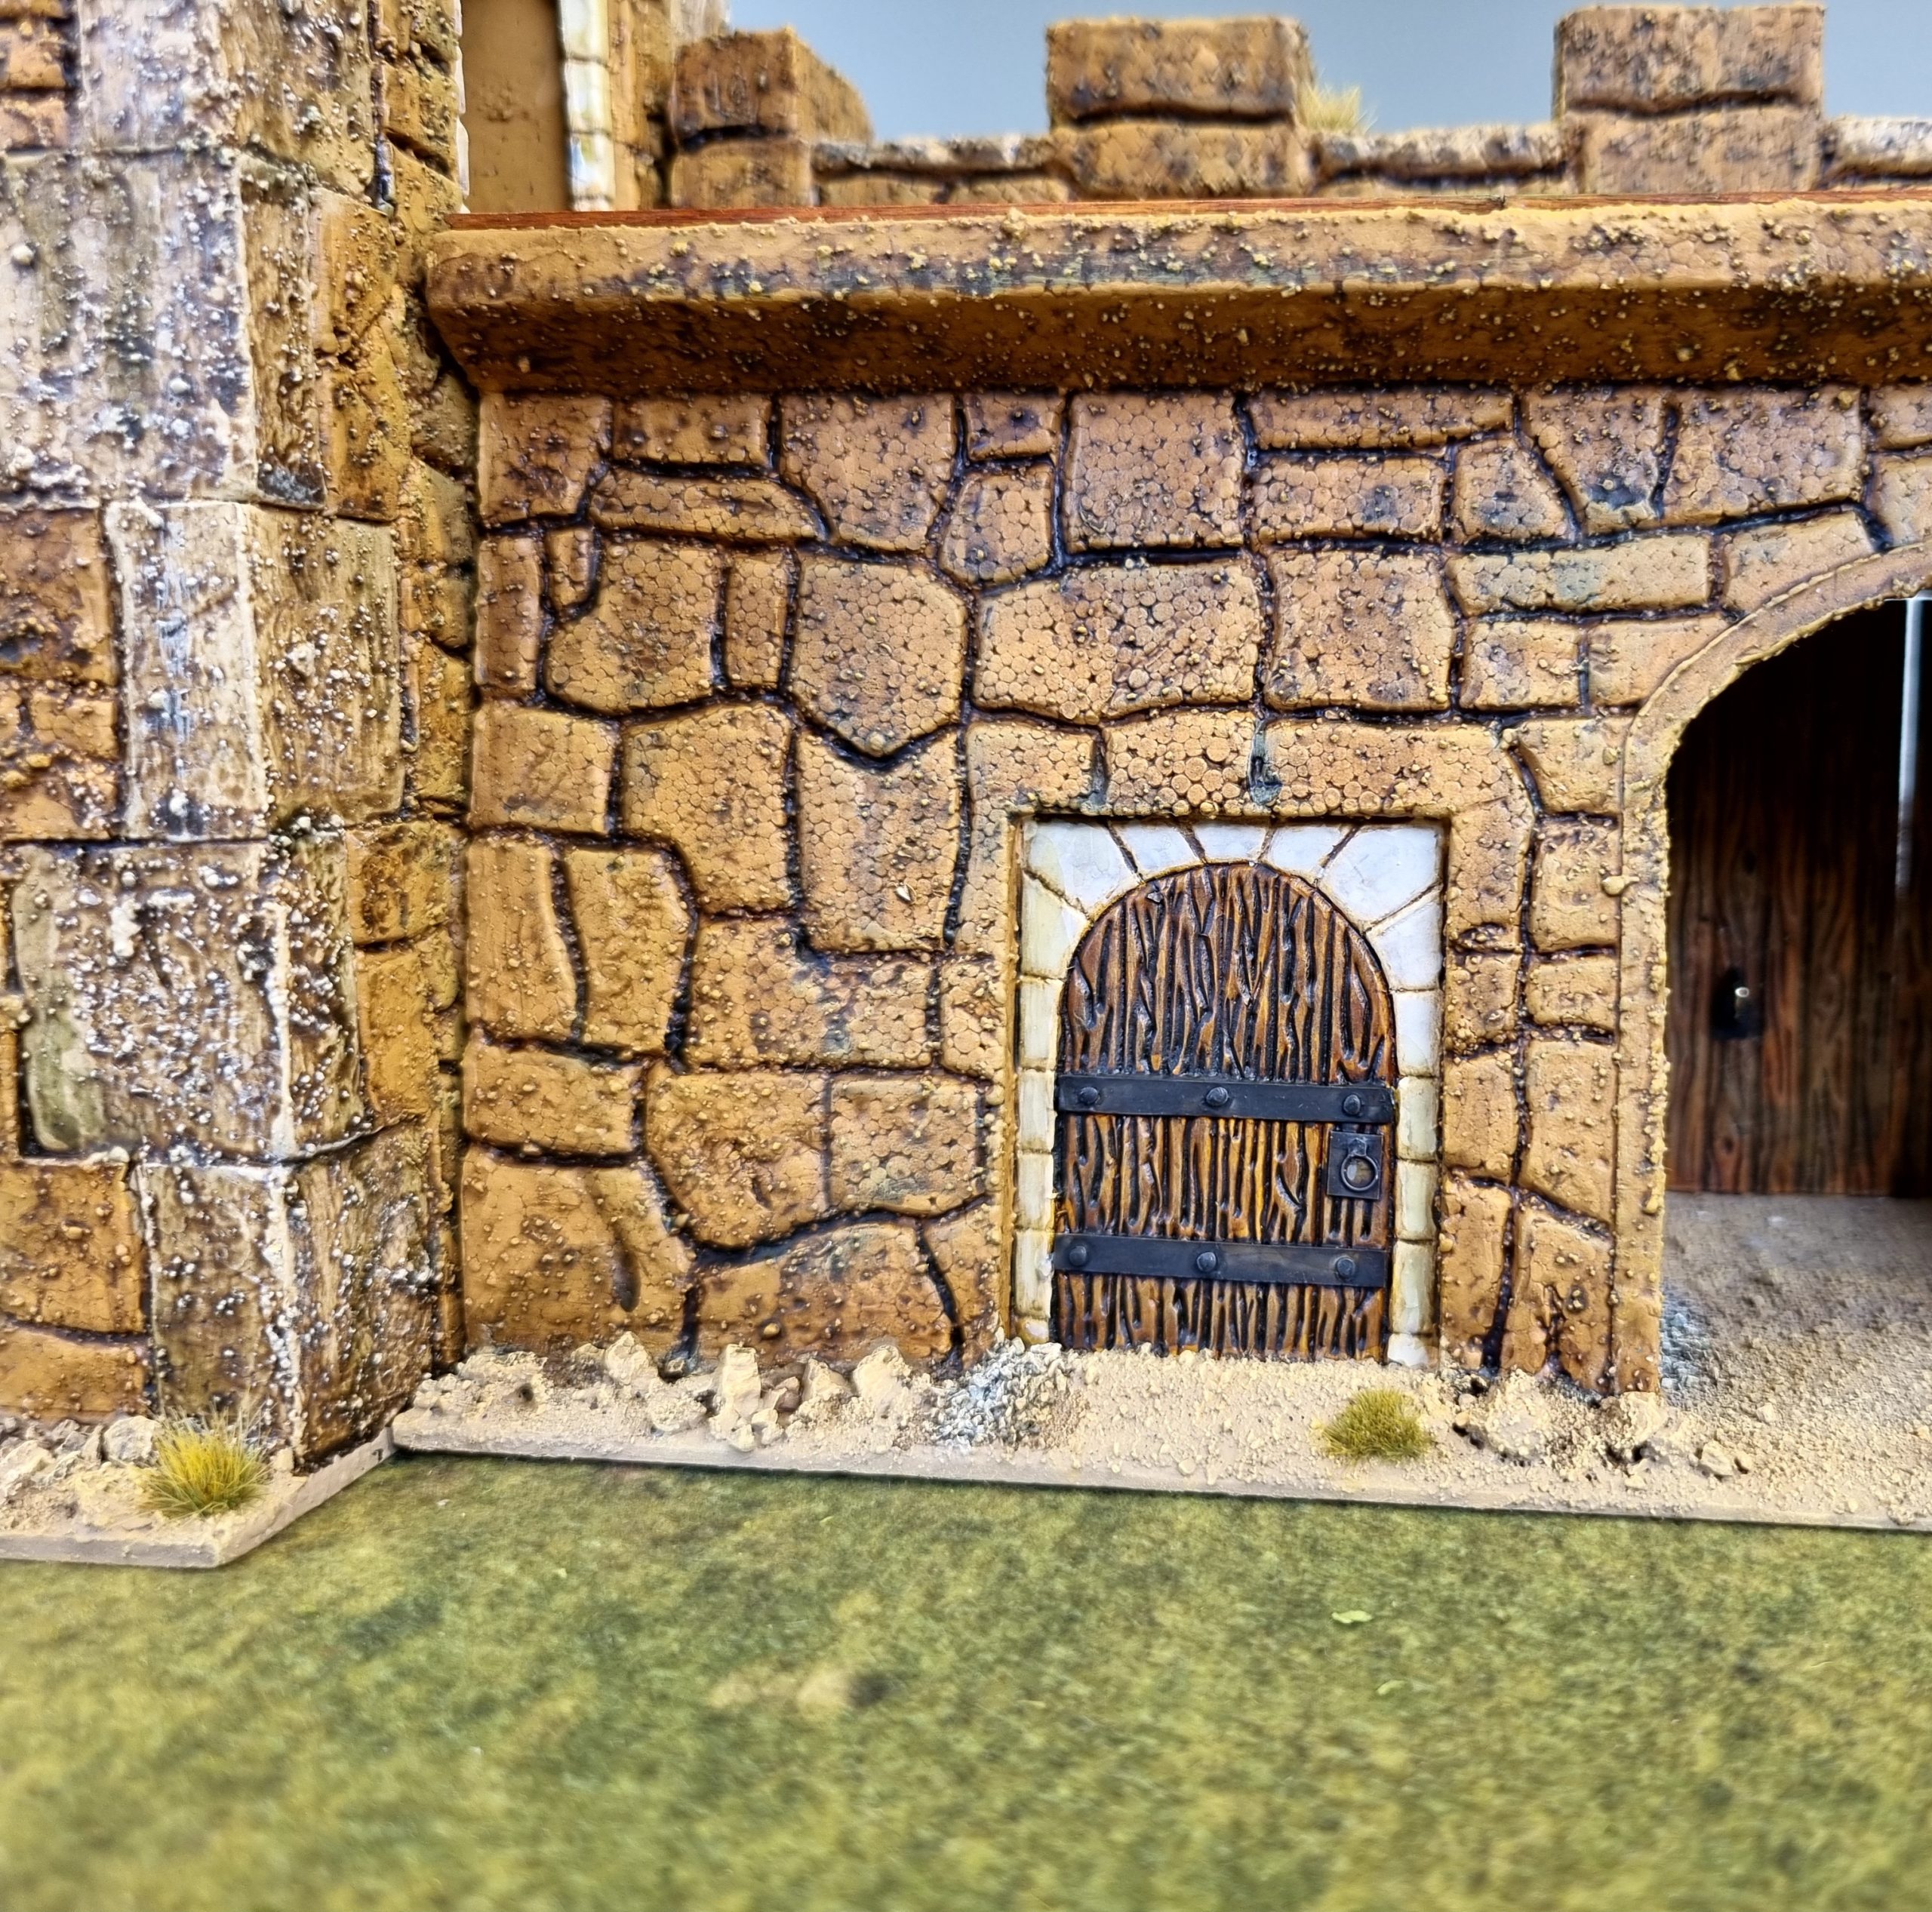
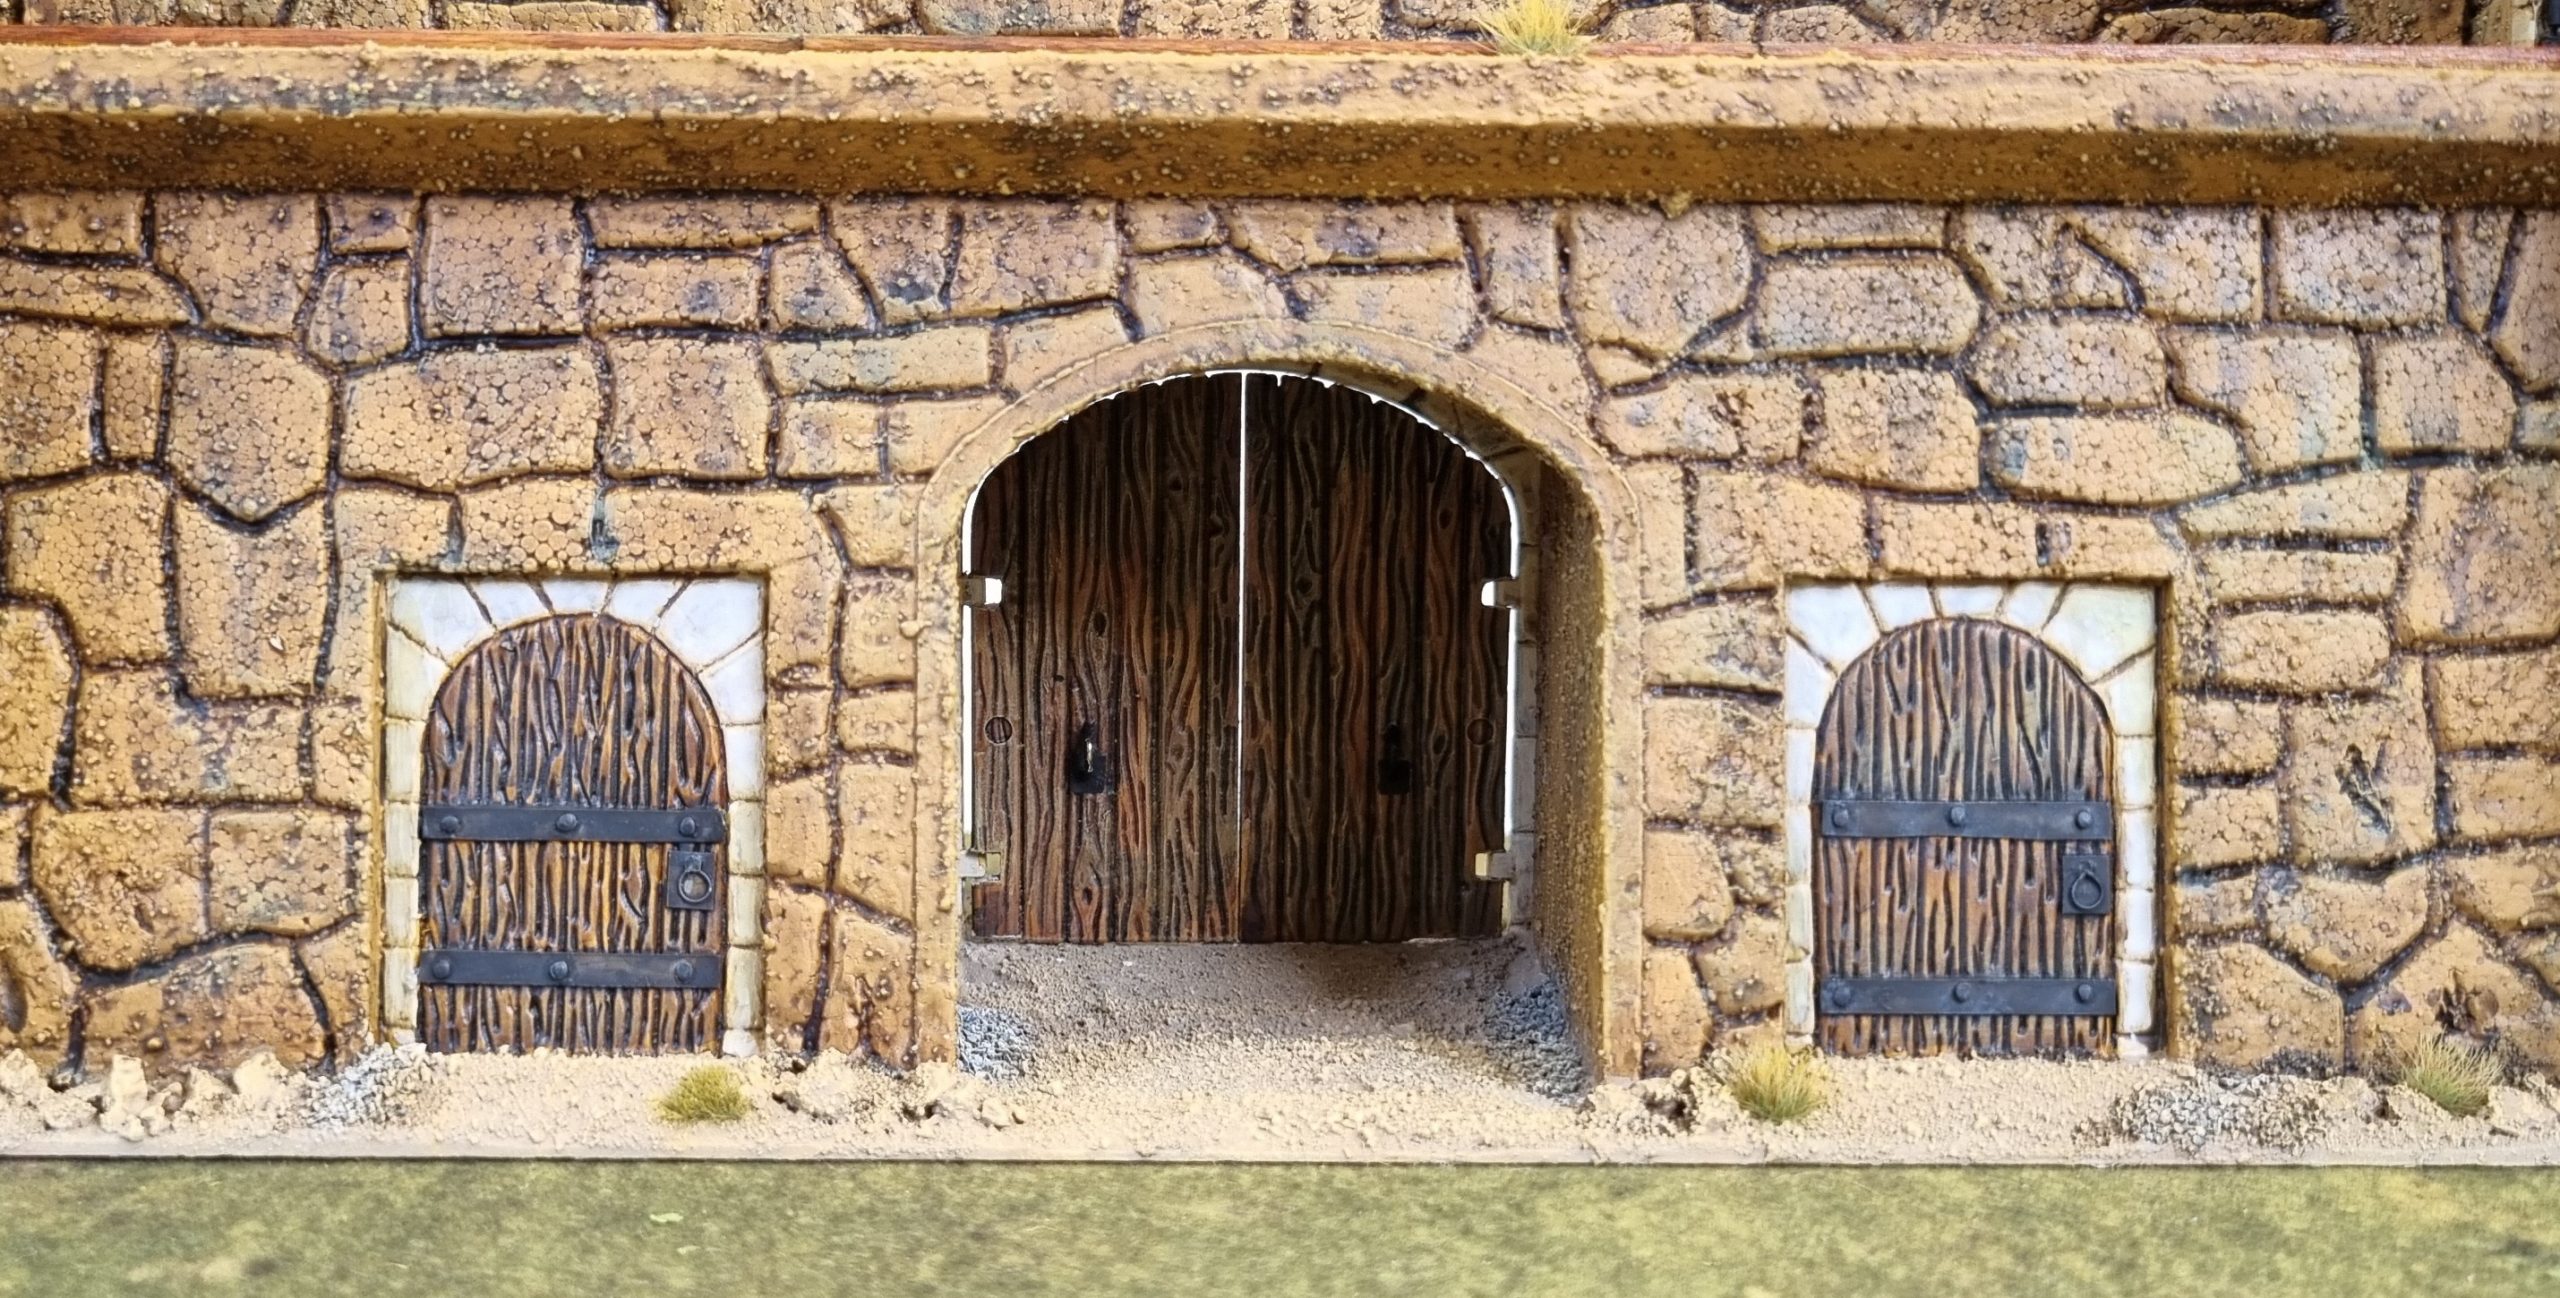
Rampart Doorways
Because my second fortress box was incomplete it was missing enough doors to fill all the ground level gaps on the wall ramparts. These don’t lead anywhere so they do not have to be hinged. I made my own by etching out a pattern on 2mm foamex styrene and padding out with insulation foam
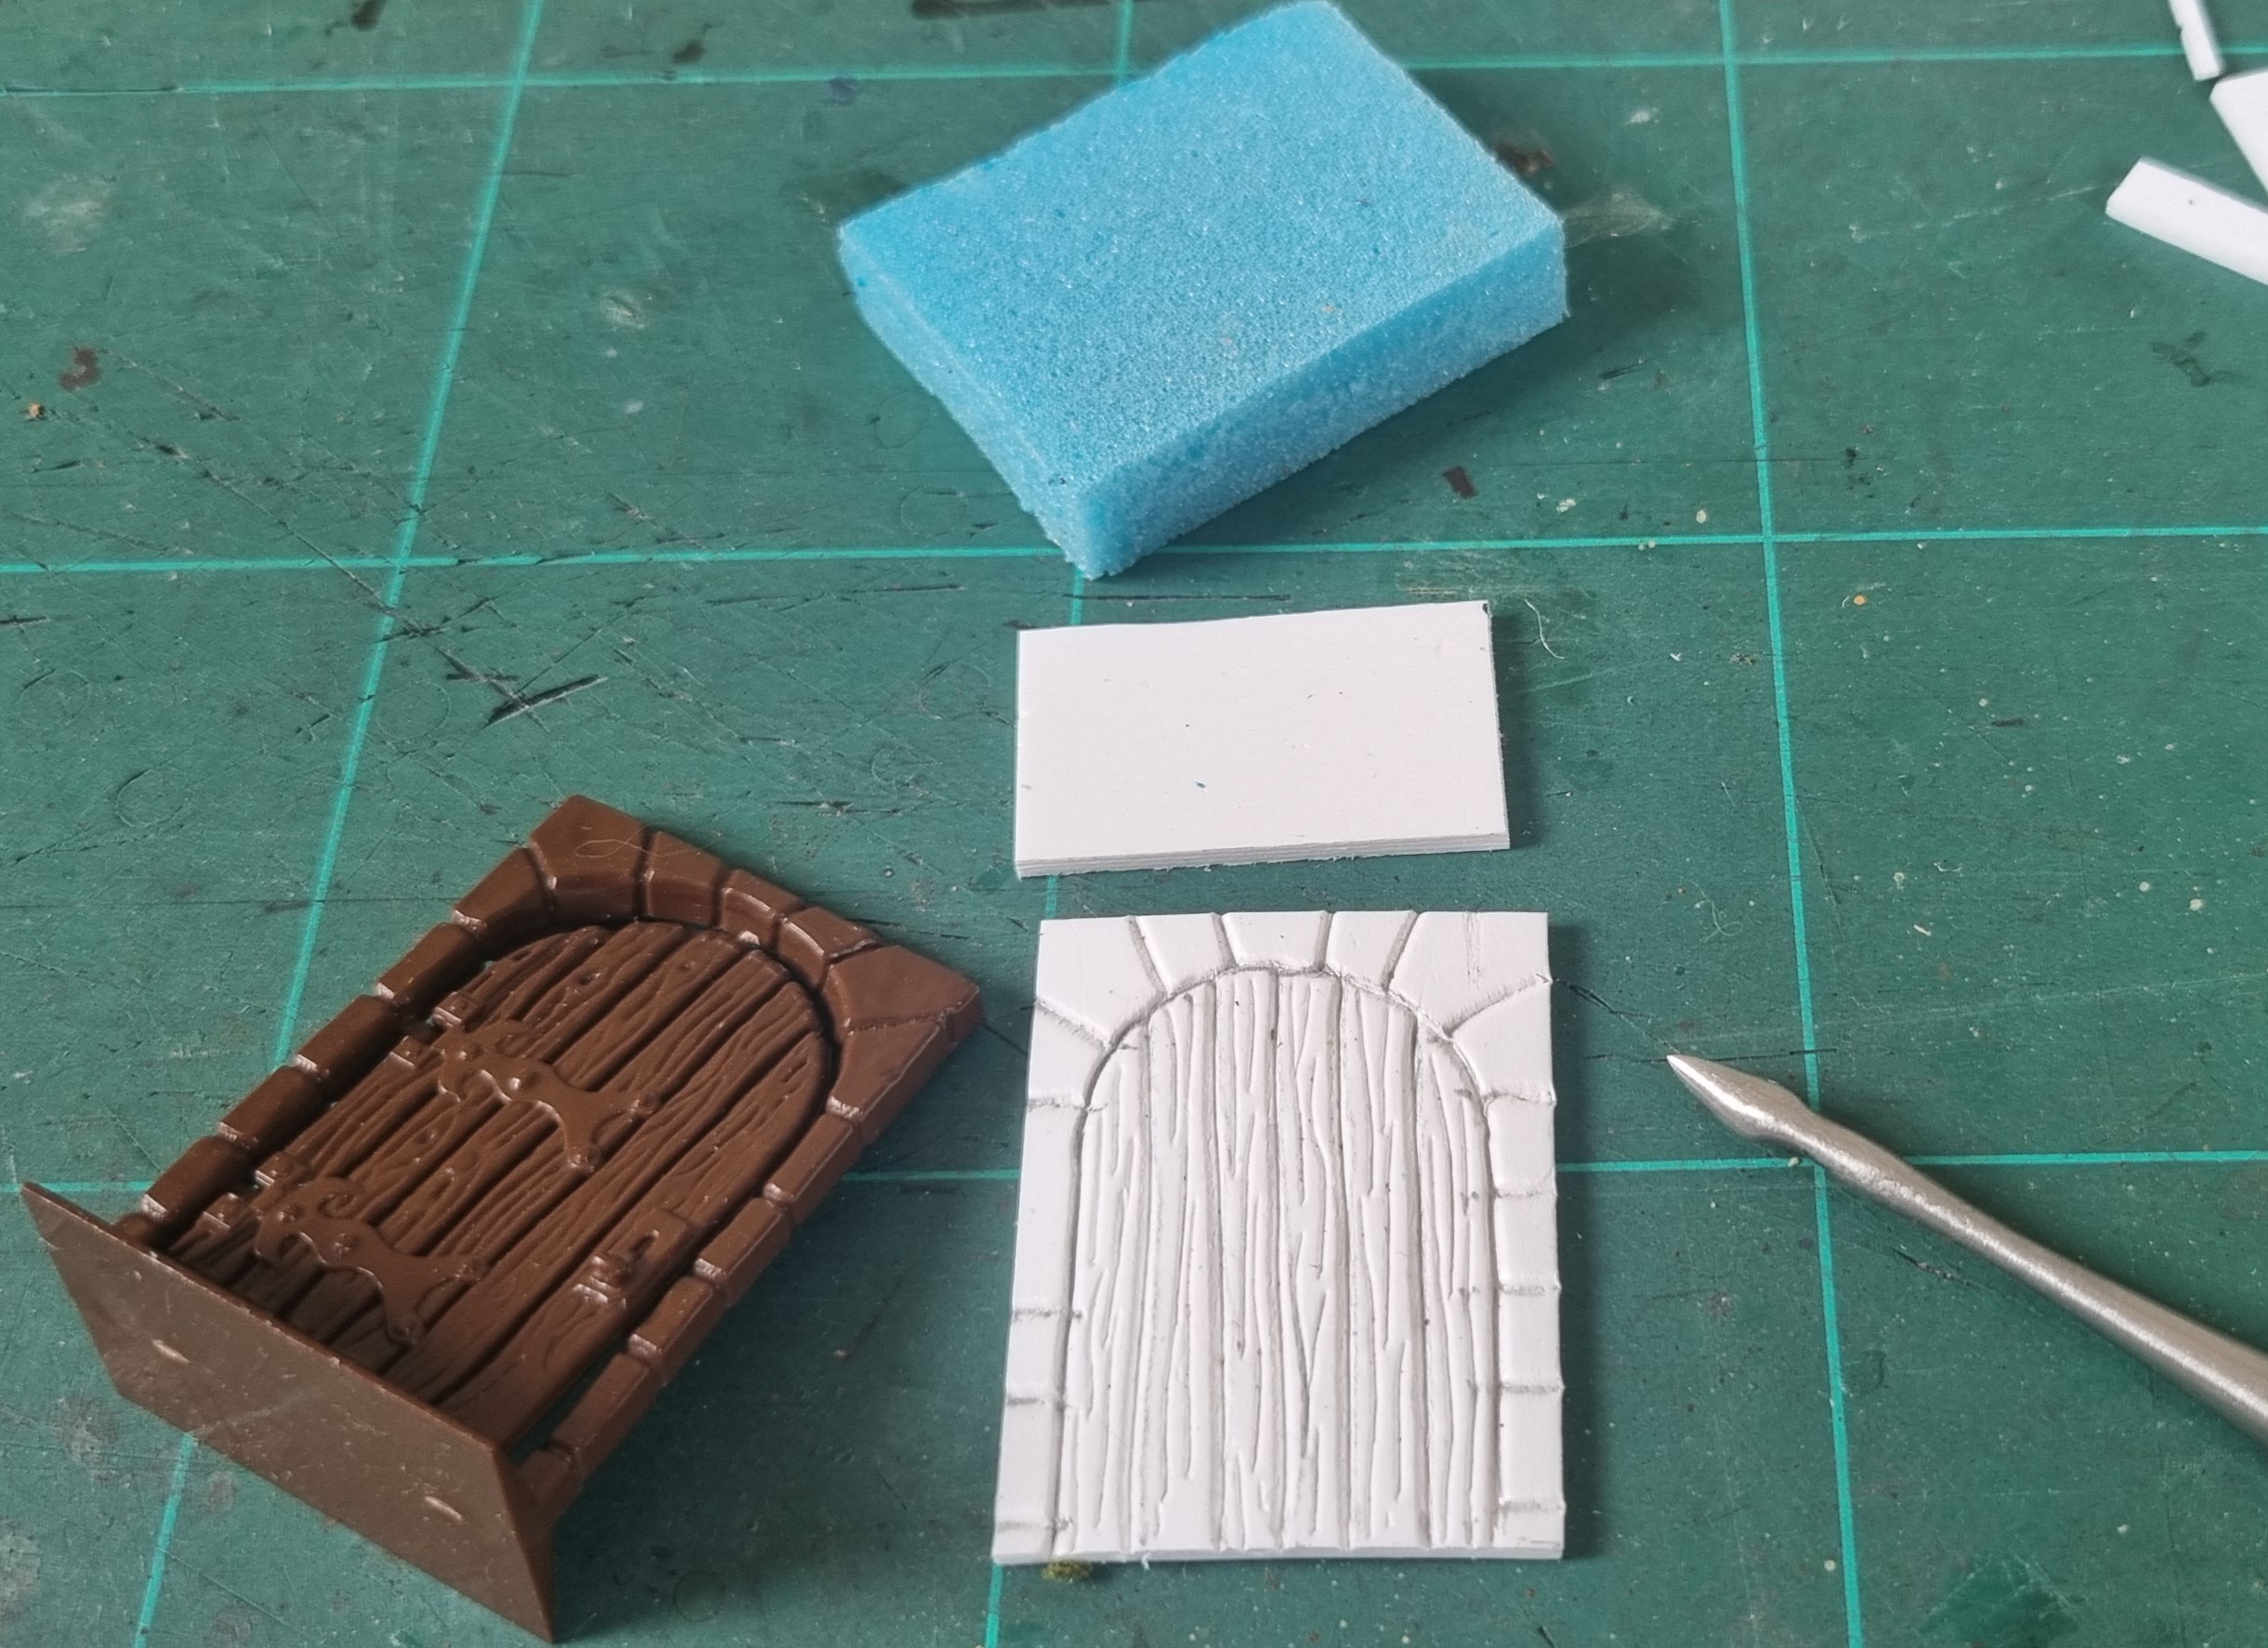
Detailing was then added with plasticard, fuse wire and pin-heads.
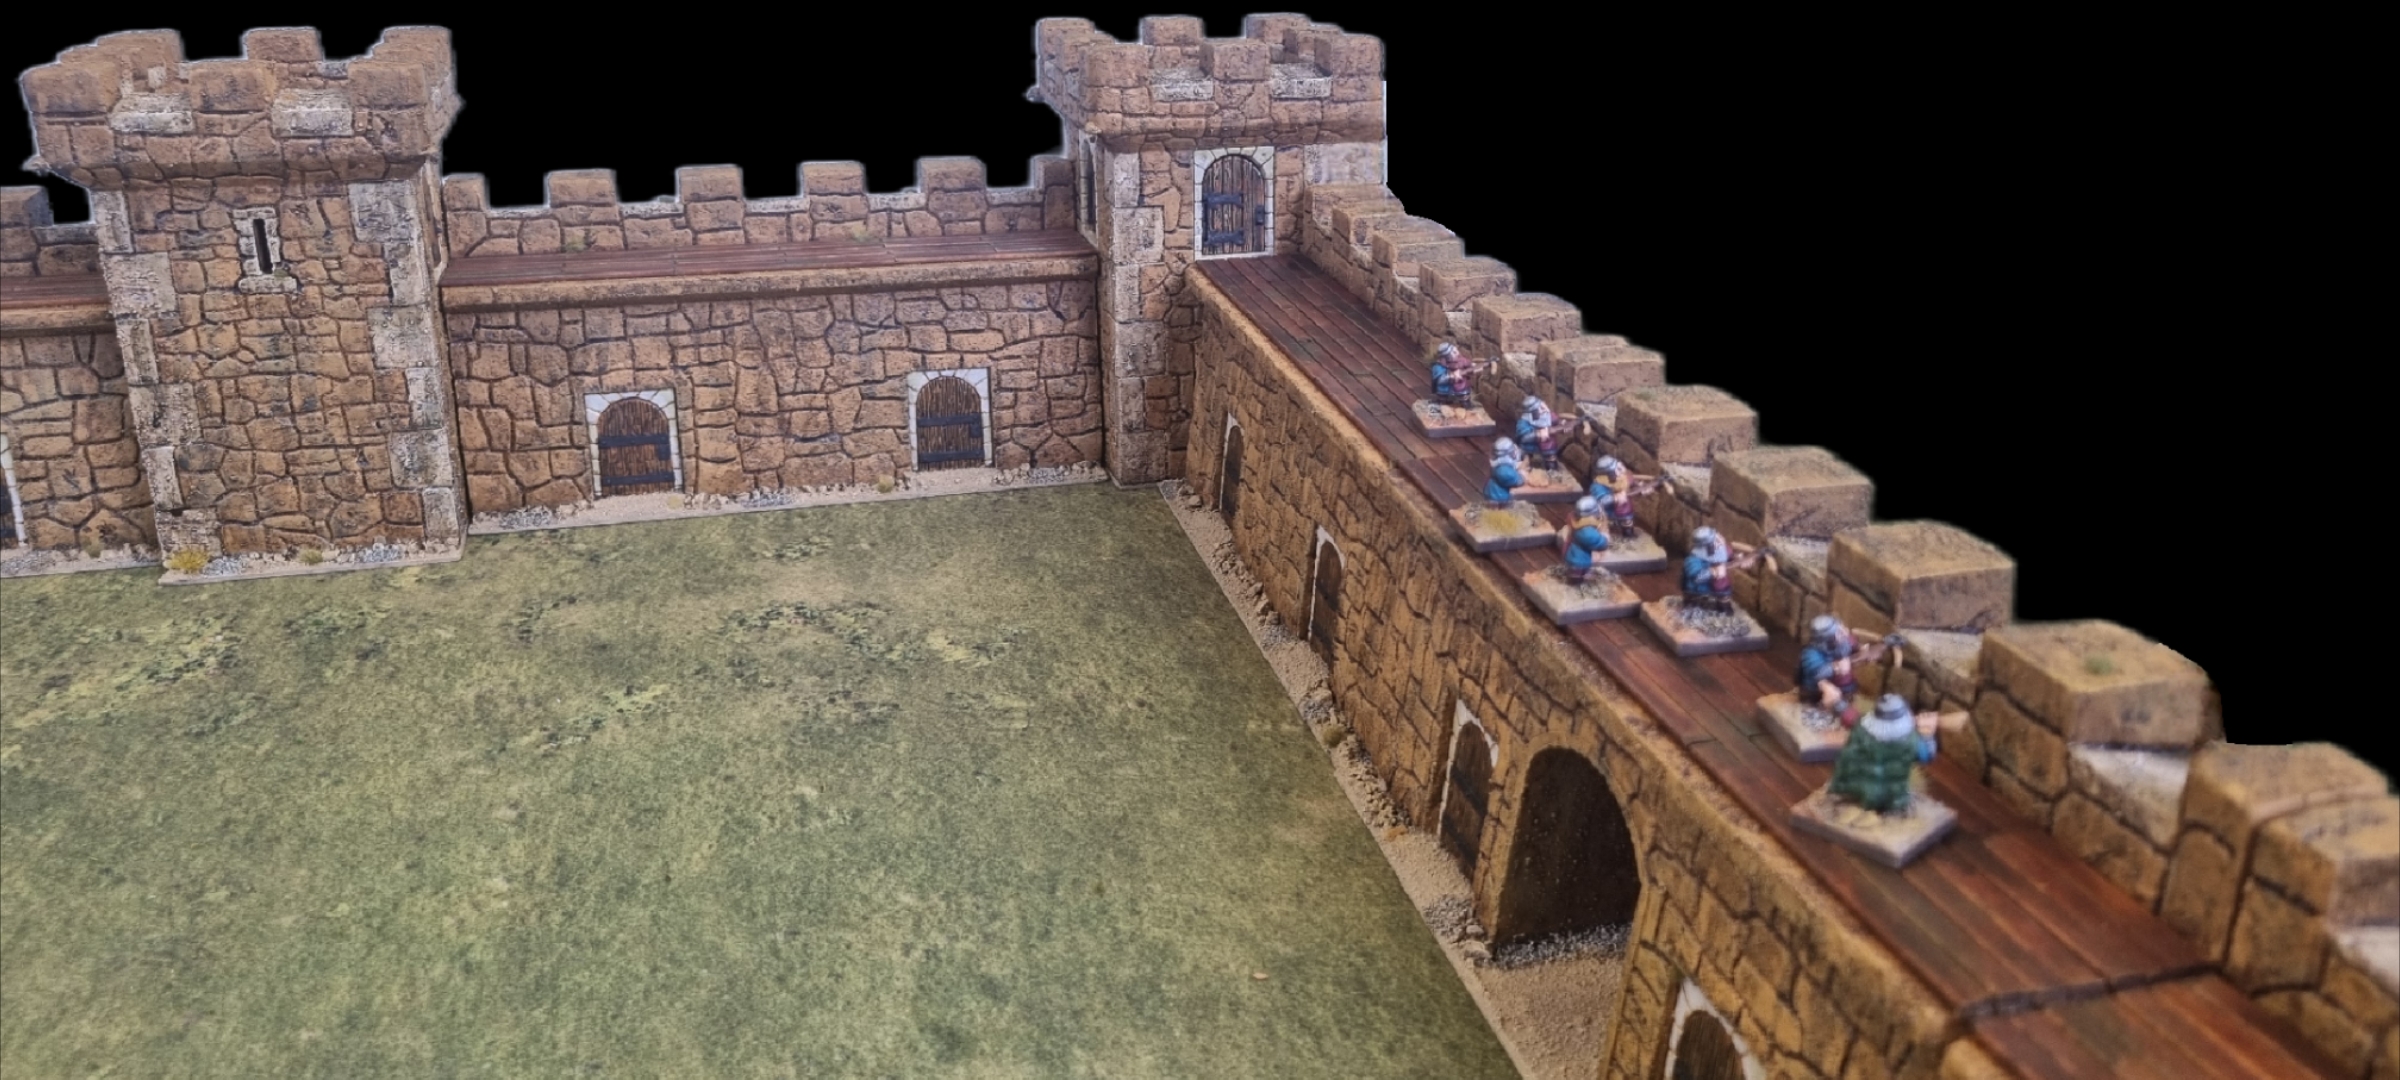
Walls
The walls come with very flat and boring walkways. So, liking the decking effect on the towers, I decided to do all the walls this way. Two hundred and twenty coffee stirrers later…..
Painting
Mostly a yellow sandstone colour (B&Q mix based on the Army Painter colour Desert Sand). Lots of washes and drybrushing for weathering
And….
That’s it. Time for a beer I think !!!
Brilliant project, well done!
Looking forward to seeing this on the table at Ayton.
Fantastic modelling, now I wish I had never sold my one on.
That’s an awesome piece of work. Look forward to seeing it in real life.