One of the great things about Frostgrave is that it’s so got many gamers into scratchbuilding city scenery. This is the first time that i’ve had a go at making buildings and so I thought I would scribble down how i’ve gone about it over the last couple of months.
Materials
Foam:
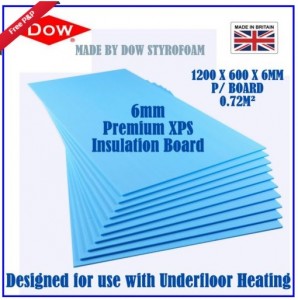
I have been using hard Styrofoam (in the UK this is the blue variety – not sure how this changes from country to county). I managed to get large sheets of this very cheaply via mail order from an Ebay shop supplier called FloorheatPro .Next day delivery, well packaged and post free. One sheet is enough to get you started on a few buildings, two sheets should give you good coverage on a normal 3’ x 3’ Frostgrave table. I used 6mm foam for most of my buildings but also 10mm foam for some walls. In hindsight I might have made more use of the 10mm to give sturdier construction to some of the buildings. The foam is quiet hard and doesn’t chip easily but isn’t as strong as foamboard with the carboard cladding. The reason I didn’t use foamboard was that I find it quite difficult to cut easily and accurately and also you can’t etch the surface in the way that you can with Styrofoam.
Plaster:
Just the normal gap filling type in powder form (own brand Polyfilla is just fine)
Paint:
I actually have an old GW scenery guidebook that suggests using GW paints for scenery. Unless you want your model buildings to cost more than real buildings then don’t!
Emulsion sample pots are a great resource. In B&Q in the UK you can get them to mix any colour in a largish tester pot for less than £3. For my sandy scenery I got them to match the Army Painter Desert Yellow so that my home made buildings could match my spray painted plastic and resin scenery items. Don’t spray foam terrain pieces – the propellant in the spray will melt the foam.
Coffee stirrer sticks:
Apparently the well-known coffee shops make more than 75% margin on a cup of coffee. So go on, why not indulge in an extra stirrer or two with your double mocha skinny crappe? They have so many modelling uses – from stirring paint to making floorboards. No self respecting gamer should be without them. If you feel the need to needlessly sustain the profits of the international hot drinks industry then you can always buy your own balsa wood.
Sand:
Buy a tub of GW sand or a sackful of builders sand for the same price – your choice. Builders sand needs sifting through a sieve though.
Glue:
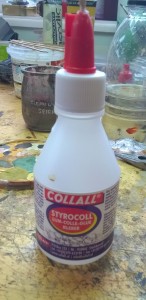
Styrofoam is not porous – this means that PVA glue will never cure properly since it needs exposure to air. The best glue is (unsurprisingly) Styrofoam glue which you should be able to find in craft shops. This is a contact type adhesive – coat both sides, let it dry then push together for an instant bond.
Other stuff you will already have or find useful
Steel Ruler, Protractor, Craft knife with fresh sharp blades, lego bricks – for building corner braces, french curves – for tracing curved shapes, hot wire cutter
Stages of Construction:
Inspiration
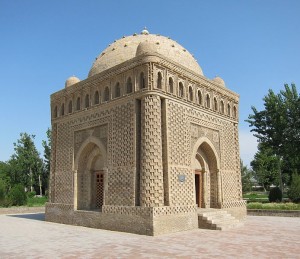
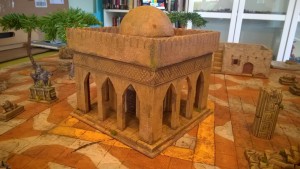
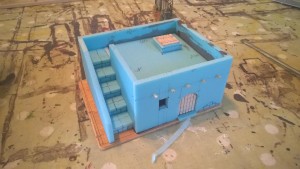
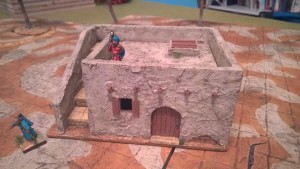
Have a concept of what you want to achieve before you start and then hit google images for buildings that give you feel for what you want to achieve. You”ll probably want to simplify the design to make it something more straightforward to build. As an example for my Araby Frostrgrave I wanted to build a Mausoleum for the scenario of the same name. Searching for Arabic tomb and Arabic mausoleum came up with images like the one below which then got adapted to be my actual building….
Planning
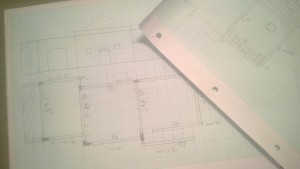
Plans ? real men don’t need plans! Well actually yes in this case we do. Certainly when first starting – there are a few gotcha moments and it really makes sense to sketch out what you are intending to construct. This might be obvious but it also helps to have model figures to hand – just to check that they could get through doorways, see over battlements etc.
Measurements
An outcome of planning. Think through all your measurements. If you want to make a simple 12cm square building with 6mm foam then two walls will be 120mm long and two walls will only need to be 108mm long because of the overlaps.
Be precise. If you are building olde-worlde fantasy buildings then things can (and should be) a bit higgledy-piggledy but even so you want to make sure it all fits together. One of my biggest problems has been getting my pieces precise. My main problems have involved the following issues
- Straight lines. Don’t assume the edge of your foam is a straight line. Draw a new one for yourself each time. Equally don’t “chain” together pieces so that a cut edge on one piece is also an edge on the next piece – draw each piece out individually with a gap between them so that a cutting error on one piece doesn’t impact an adjoining piece as well.
- Right angles. Unless you are building Baba-Papa World you are going to find yourself cutting lots of right angles. Use a protractor and check these again and again. A good way to check right angles is to build one using lego bricks and then test your cut piece against it.
- It may not seem like much but a mm or two out in either direction can make things annoyingly tricky. Use a sharp pencil or fine pen and make sure you are looking directly down on the ruler and not from an angle.
Cutting
As with measuring make sure you are looking down on your cut and that the blade is vertical – it’s all too easy to cut on a slant which means that one side of your wall will be a mm or so longer than the other.
Etching out details
Do this before gluing. You can use a ballpoint pen. I use the rounded end of a small sculpting tool. First, using your scalpel cut shallow lines (1 or 2 mm) where you want your pattern detailing. Then use your pen over the cuts to push the foam apart and create whatever markings you want. If you are doing brick or stonework then try to do this freehand so that it doesn’t look too regular. The more detail you can do at this stage the better – it’s the fine detailing that will make the building look that bit more special when its finished.
Painting:
The foamboard benefits from having some extra strength added in the painting process, so I tend to add some plaster and a bit of sand into the paint as well. Thickness depends on what you are intending your wall surface to be – if its covering brick or stonework then it still needs to be a liquid. If the objective is a plaster coloured wall then a thick paste works much better. Its always best to mix paint and plaster so that if it chips in future you don’t get a white mark showing through,
Weathering
Don’t leave it at the basecoat – the weather makes all the difference. The fun but with buildings is that you can use a big brush and have fun! For my deserty type buildings I’ve done the following:
Base coat – Desert yellow
Initial wash – very thin brown wash (burnt umber and a lot of water) in one or two coats. Splash it heavily all over.
Drybrush a few coats of complementary colours – ochre up to buff.
Using a thin wash of brown and green ink mix, spot wash specific areas – cracks, window ledges, joins etc. Also splodge some in the middle of walls etc.
Use selective drybrushes of moss-green, green-yellow, orange-brown in specific areas – an inch or two of wall etc.
Stick on grass tufts here and there for a final effect.
Useful References
How to Make Wargames Terrain (Games Workshop) – David Cross & Steve Cumiskey
Battlefields in Miniature – Paul Davies
Making Terrain and Buildings for Historical War Games by Tim Hall and Jon Sutherland
Any of Dianne Sutherland’s monthly articles in Miniature Wargames with Battlegames magazine

Fantastic article, thank you for writing this.
Good one. Interesting take on Frostgrave, more Sandgrave.
Excellent article. I keep meaning to try this stuff but don’t really have the storage space for 28mm scenery!
Excellent. A very well written and useful article. Who’d have thought it?? 😉